
Host a WordPress Site on Amazon EC2 and map to the custom domain name

Cloud Engineer | AWS Community Builder
Overview
Amazon Elastic Compute Cloud (Amazon EC2) provides scalable computing capacity in the Amazon Web Services (AWS) Cloud. Using Amazon EC2 eliminates your need to invest in hardware upfront, so you can develop and deploy applications faster. You can use it to launch as many or as few virtual servers as you need.
Now let us launch the WordPress site in Lightsail
Step1: Create EC2 instance
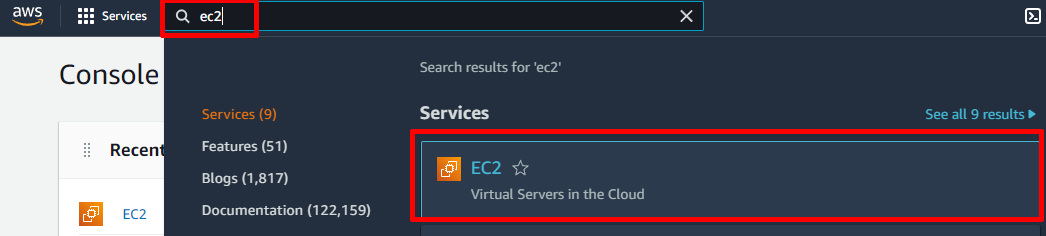
- Search EC2 on the search bar and click on EC2
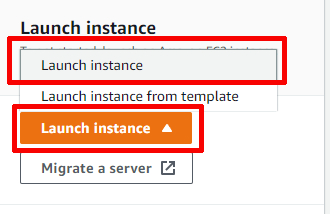
- Click on Launch instance
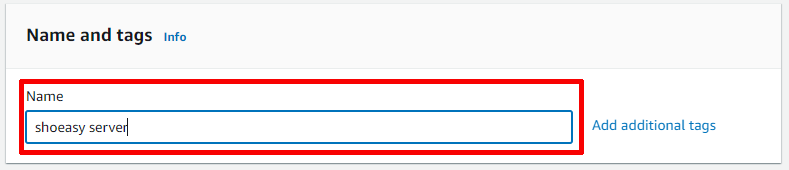
- Give a name to your instance (say shoeasy server)
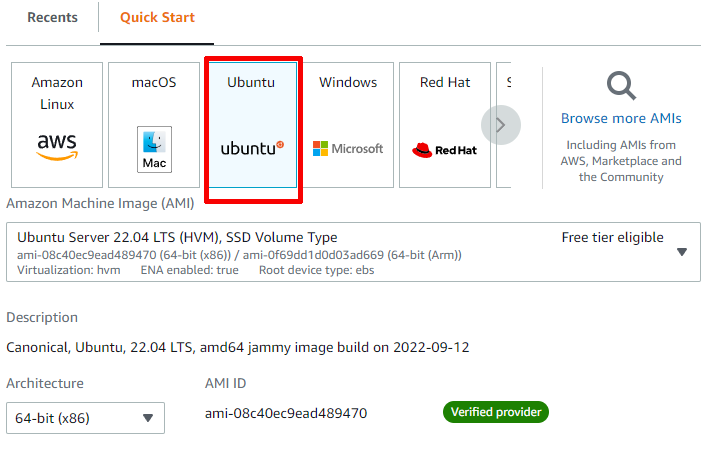
- Choose an Amazon Machine Image(AMI) (say ubuntu)
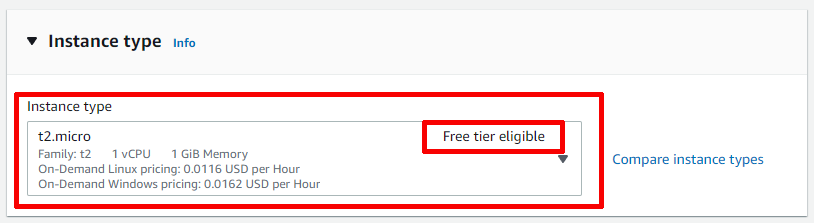
- Choose an instance type (I am choosing t2.micro because it is included in the free tier. You can choose according to your needs.)
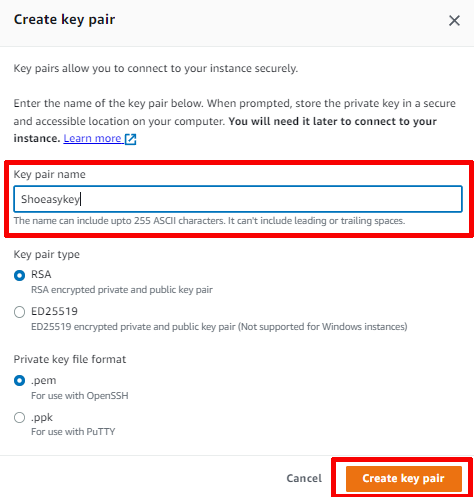
- Create a Key pair

- Give the Key pair a name (say ShoeasyKey) and Create Key pair
Note: Keep Key pair Private, anyone who gets get pair can log in to your instance.
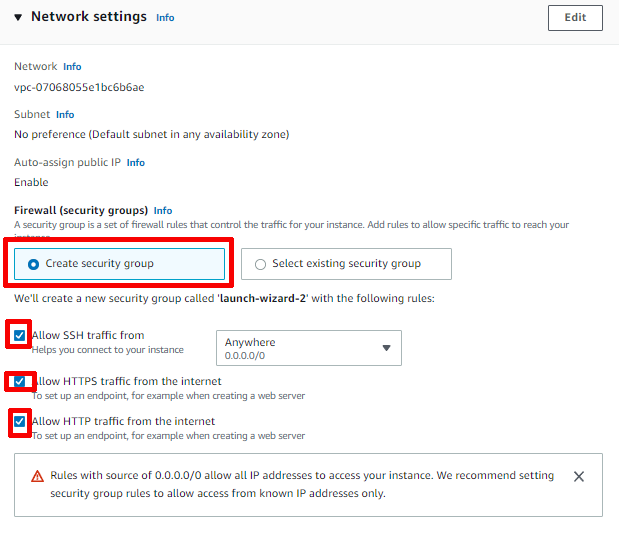
- Create a Security Group, check all 3 box
It allows inbound traffic to connect our EC2 instance.
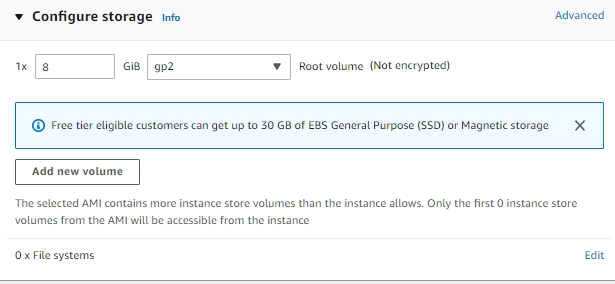
- Configure Storage
Amazon EC2 stores data on a network-attached virtual disk called Elastic Block Store. We will launch the Amazon EC2 instance using a default 8 GiB disk volume but you can get up to 30 GiB in the free tier. This will be your root volume (also known as a 'boot' volume).
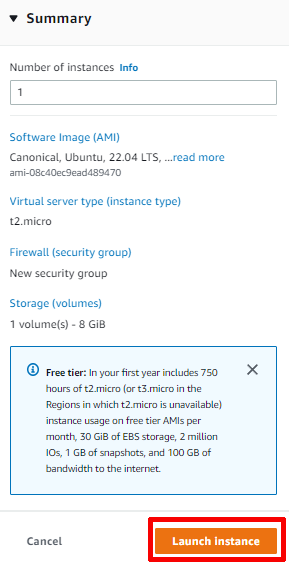
- Leave the rest of the settings default and launch instance

Step2: Assign the Elastic IP to your instance
Every time our instance is rebooted it gets a different IPV4 address from a pool of AWS IPV4. Every time IP changes we need to modify A record to point the IP to our Domain. So, to solve this problem we allocate an Elastic IP address to our domain.
- On the left sidebar under Network & Security click Elastic IPs

- Click on Allocate Elastic IP address and allocate it.


- Click on actions and Associate Elastic IP address

- Choose your running instance created in Step:1, its private IP address, and click Associate
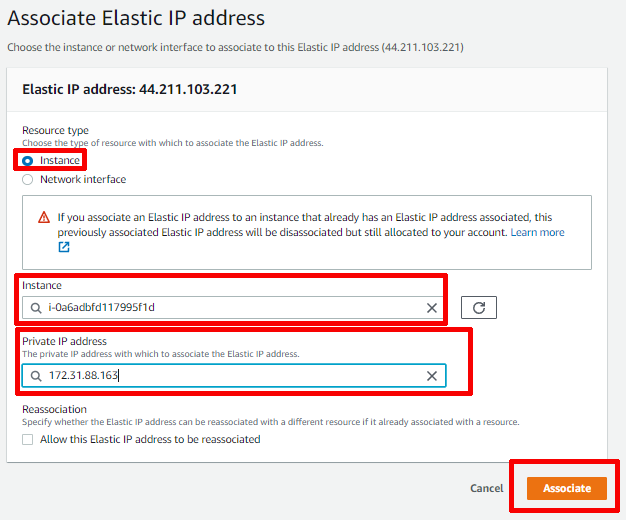
- Now the Elastic IP will be attached to our instance

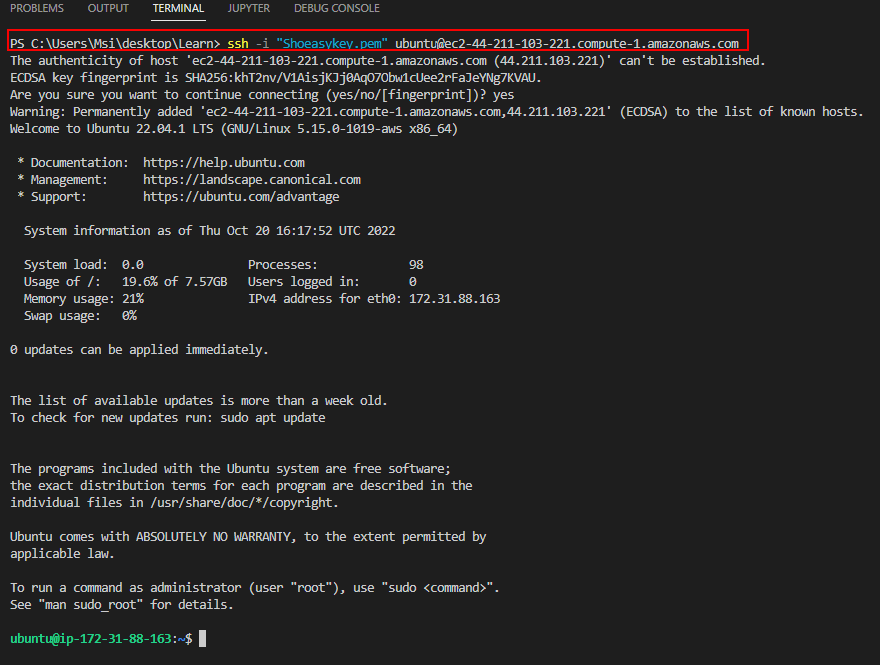
Step3: Connect to instance
We have several different ways to connect to an instance using putty, PowerShell, and even directly through the Amazon Console. I have used PowerShell but you can use your convenient method.
- Goto running instances dashboard, select instance (say shoeasy server) and click on connect

- Click on SSH client and copy the command to connect the instance with the username
The general structure to connect to an instance through ssh is:
ssh -i <name of key file><space><Public ipv4 DN>
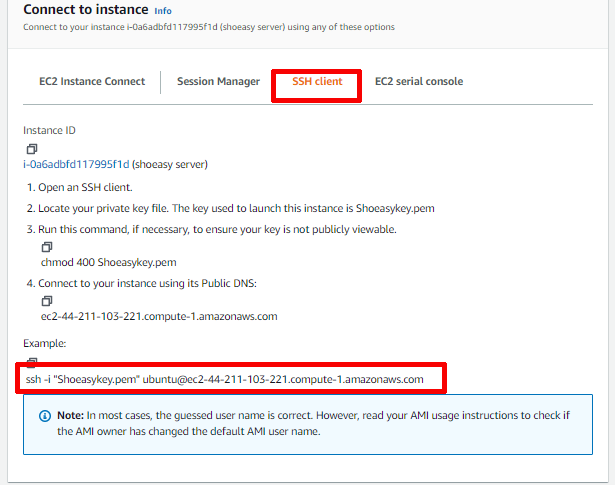
- Paste the above-copied command on PowerShell, You will be successfully connected.
Note: Launch Powershell from the folder you have your "Shoeasykey.pem" file
Step4: Installing an Apache Server,MySQL and WordPress
- First elevate your privileges
sudo su

- Update package and dependencies
apt-get update
The apt-get upgrade command downloads and installs the updates for each outdated package and dependency on your system.
- Install the Apache server
apt install apache2
- Test the Apache server by pasting your Elastic IP on the browser
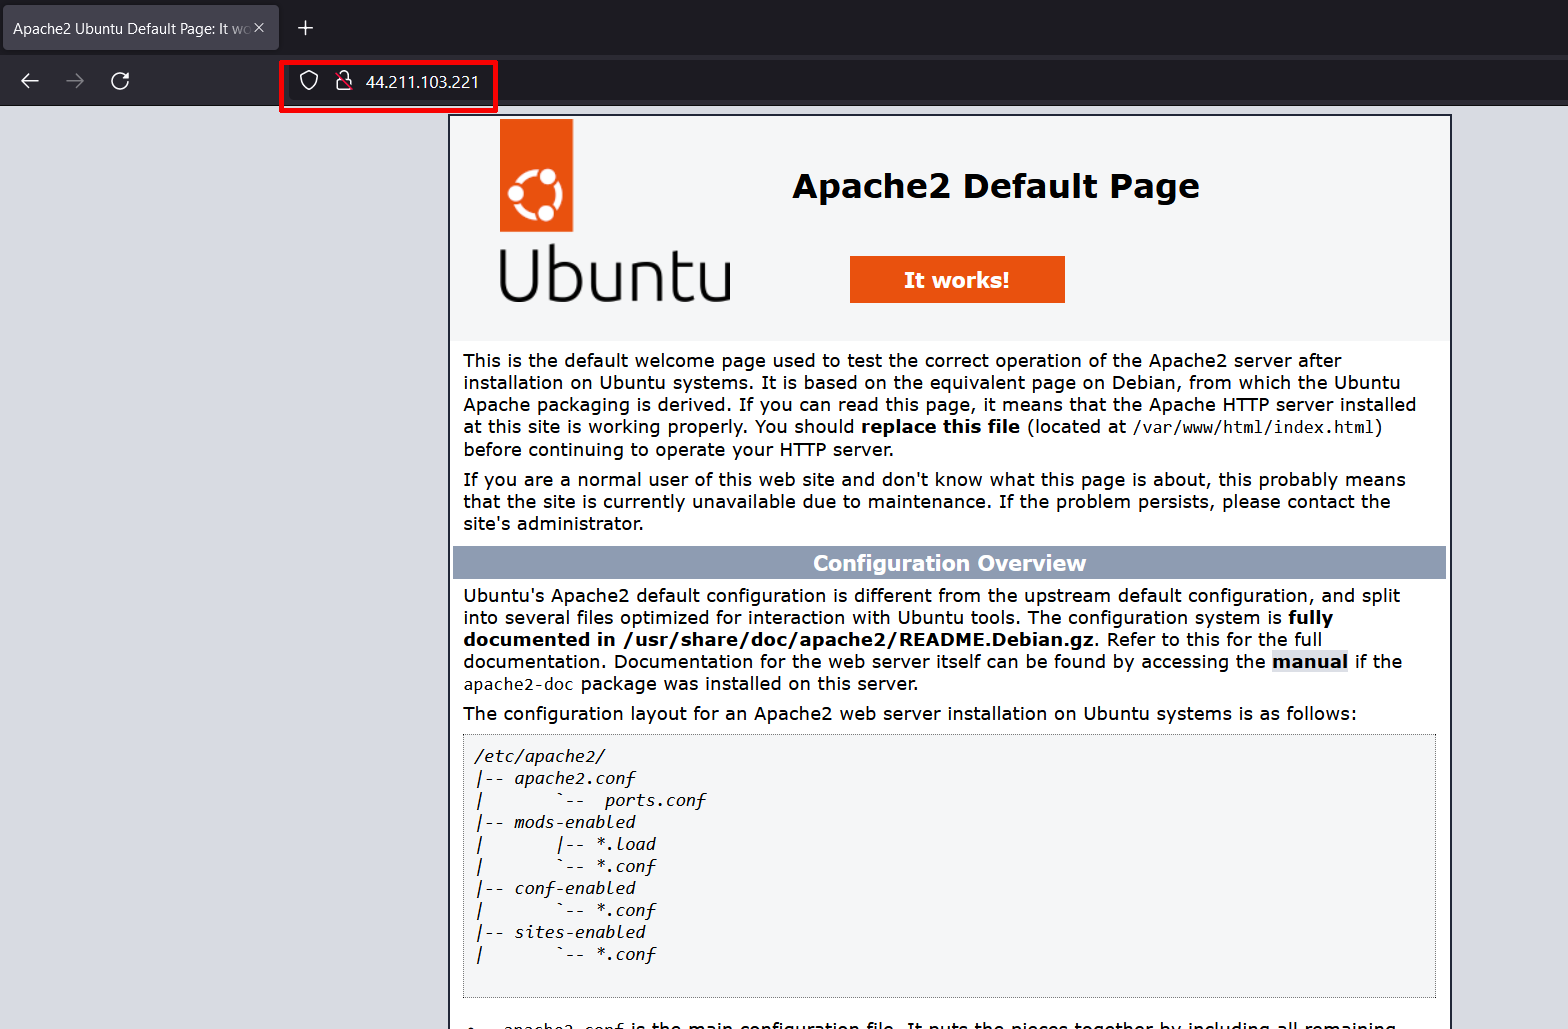
If you get the above page you are good now.
- Install PHP runtime and PHP MySQL connector
apt install php libapache2-mod-php php-mysql

- Install MySQL server
apt install mysql-server

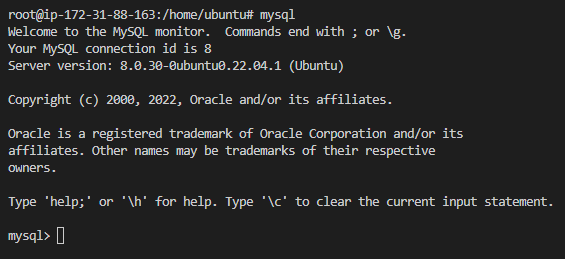
- Login to MySQL server
mysql
- Change the authentication plugin to MySQL native password
ALTER USER 'root'@'localhost' IDENTIFIED WITH mysql_native_password by 'Y0urStr0ngP@ssw0rdHere';

- Create a new database user for WordPress
CREATE USER 'your_username'@localhost IDENTIFIED BY 'Y0urStr0ngP@ssw0rdHere';

- Create a database for WordPress
CREATE DATABASE wp;

- Give all privileges to database database 'wp'
GRANT ALL PRIVILEGES ON wp.* TO 'your_username'@localhost;

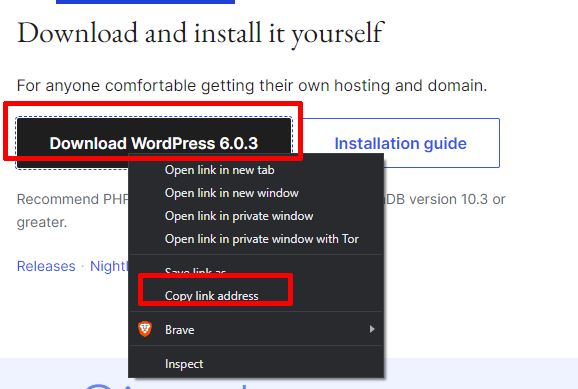
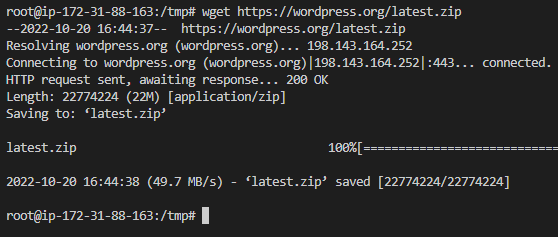
- Download WordPress
Goto WordPress and click on get WordPress, Copy the downloadable link and run the below commands.
cd /tmp
wget https://wordpress.org/latest.zip
- Unzip the zip file downloaded
To Unzip the file, first of all, you need to install the unzip package. To do so, type in a terminal:
apt-get install unzip
unzip latest.zip

- After unzipping you will find a directory named WordPress.Move the WordPress folder to the Apache document root and goto to that directory
mv wordpress/ /var/www/html
cd /var/www/html

- Reload the apache server
systemctl reload apache2

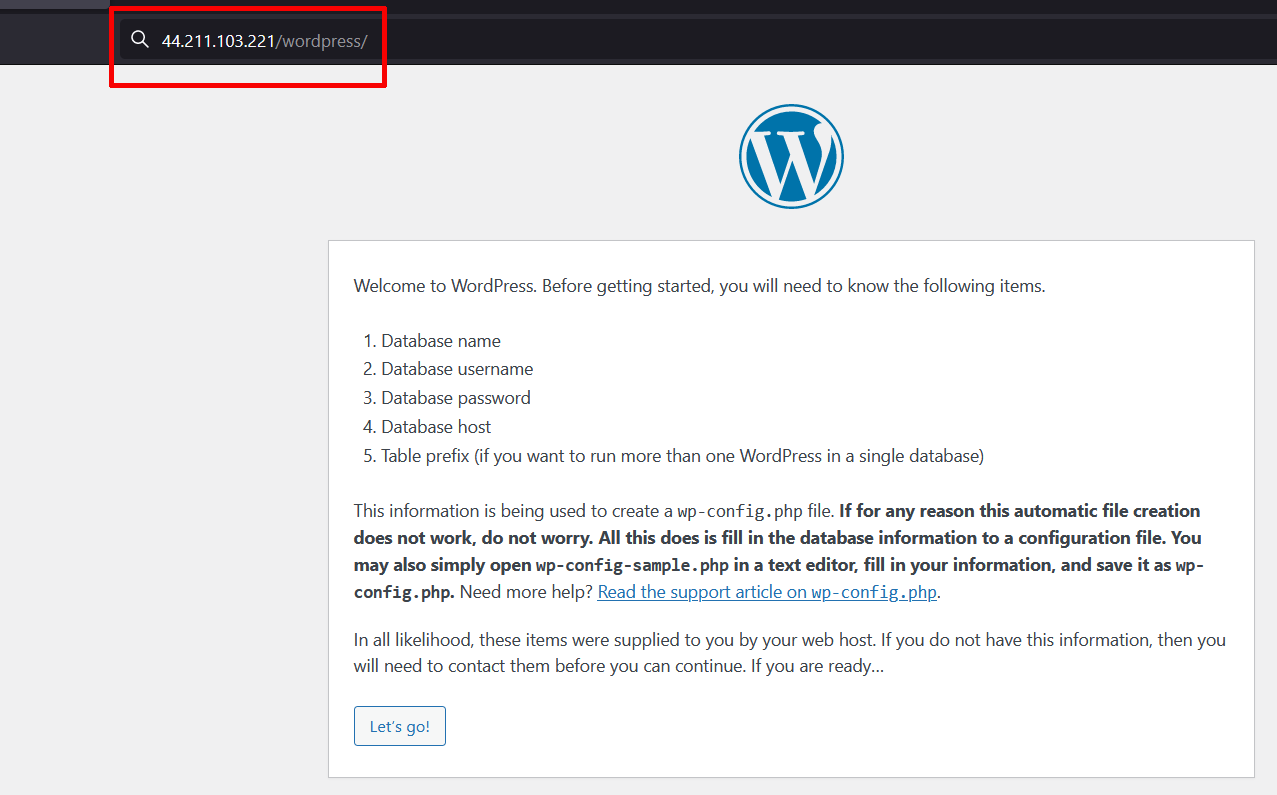
Now when you paste your IPV4 on the browser you still see the default apache page and the WordPress is accessible only on http://YourIPV4/wordpress

Let us correct this now
Step5: Moving subpart into the root directory
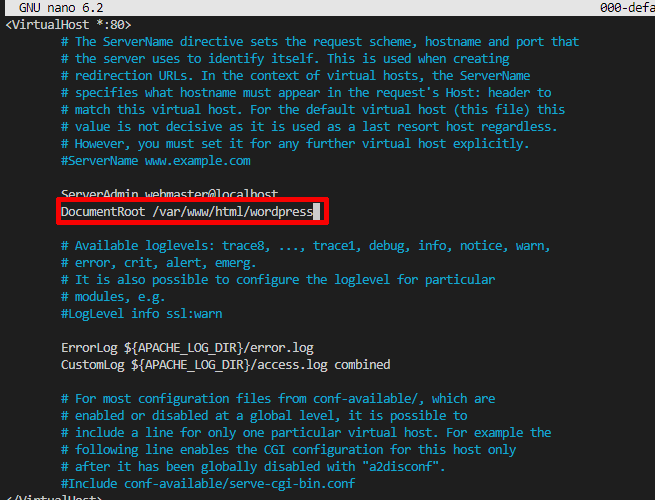
- Modify 000-default.conf
cd /etc/apache2/sites-available/
nano 000-default.conf
- Modify DocumentRoot from /var/www/html/ to /var/www/html/wordpress
- Now we can access the WordPress from the root directory (i.e. YourIPV4)
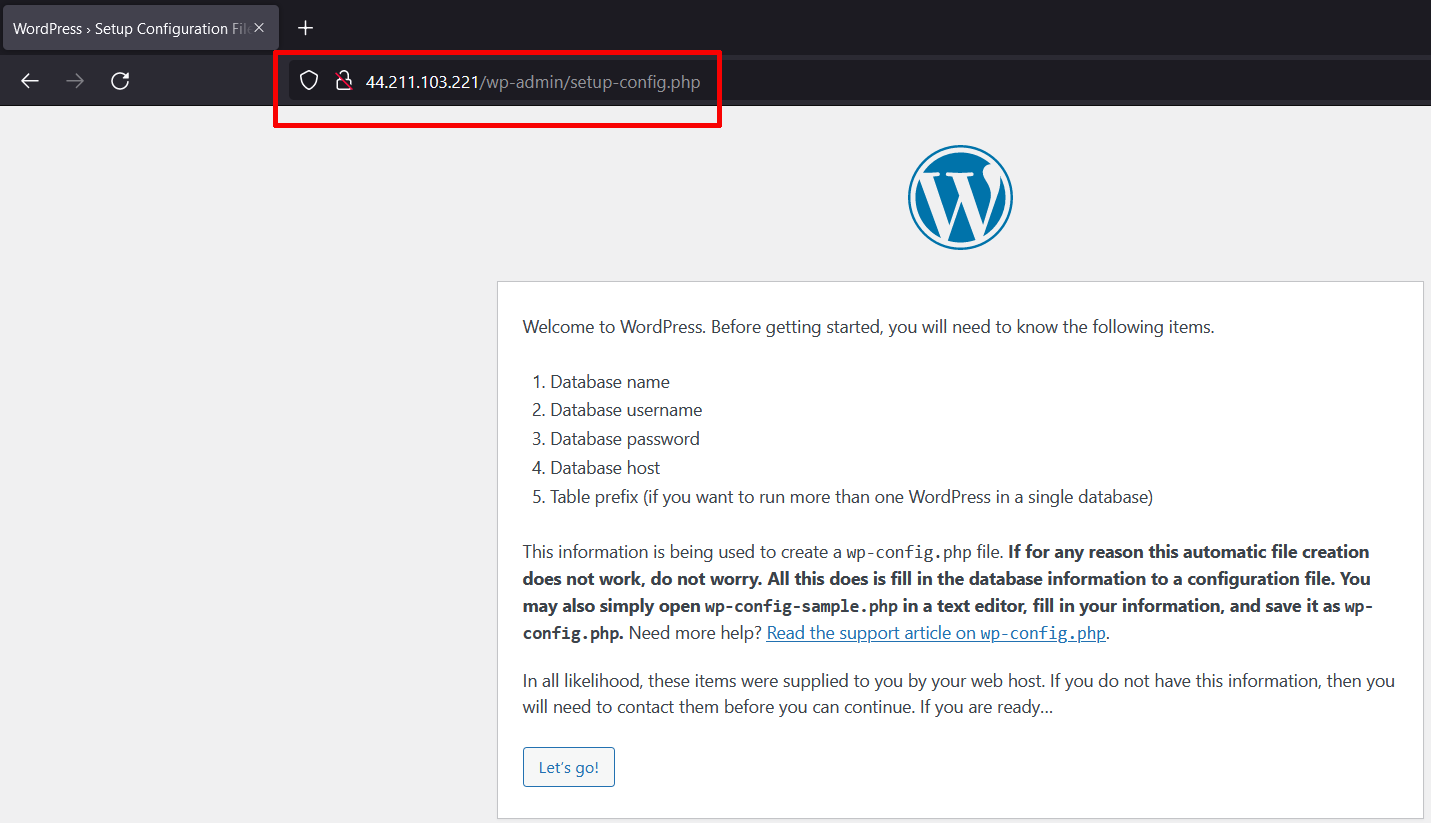
Step6: Wordpress Setup
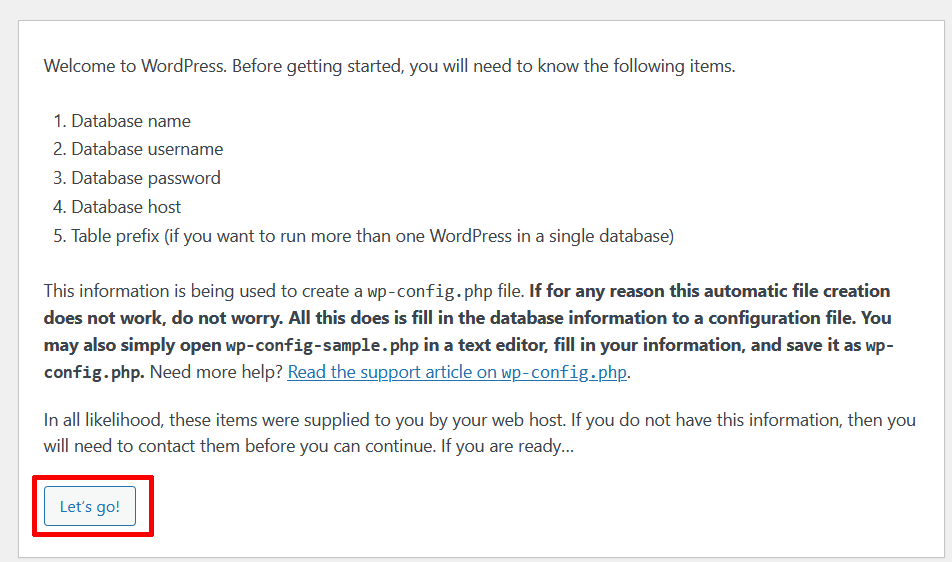
- Click on let's go
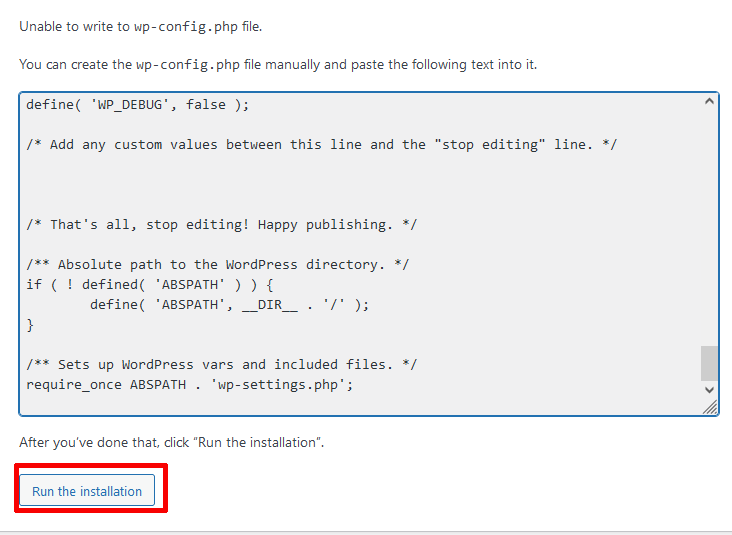
- You may get this type of error, don't worry we will fix this. Copy this code.
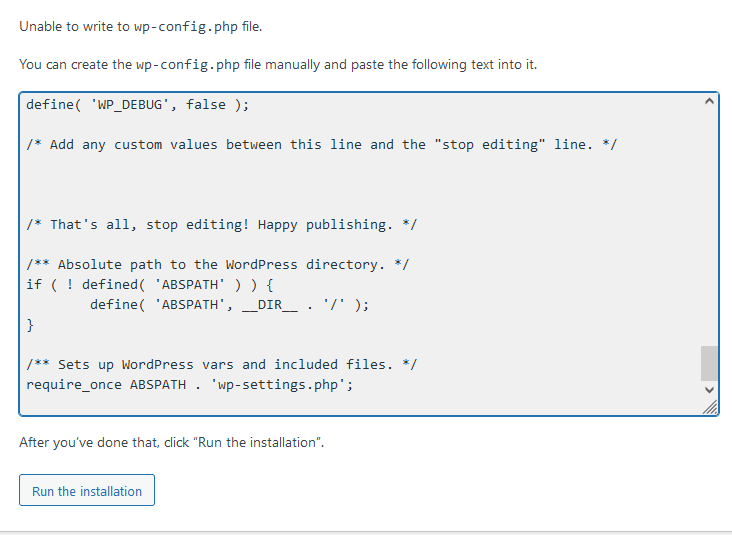
- Create wp_config.php file on the WordPress directory and paste the copied code.
cd /var/www/html/wordpress
nano wp-config.php
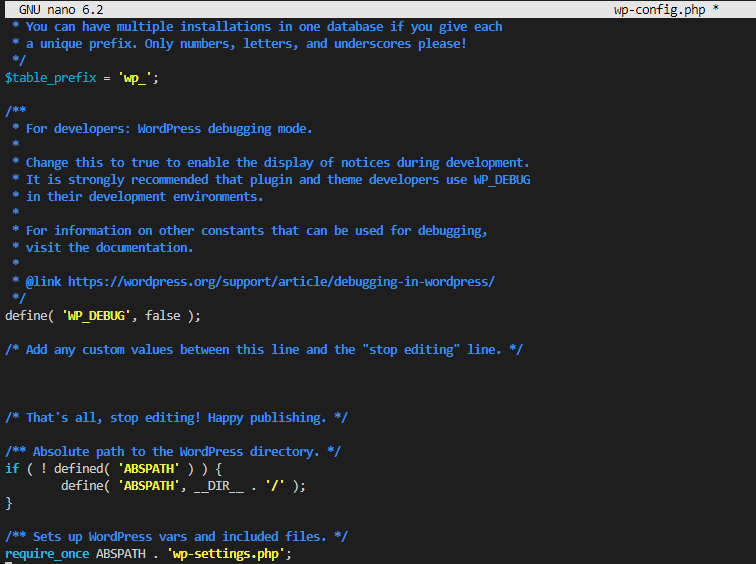
save the code and restart the apache server
- Go back to the setup process and click Run the installation
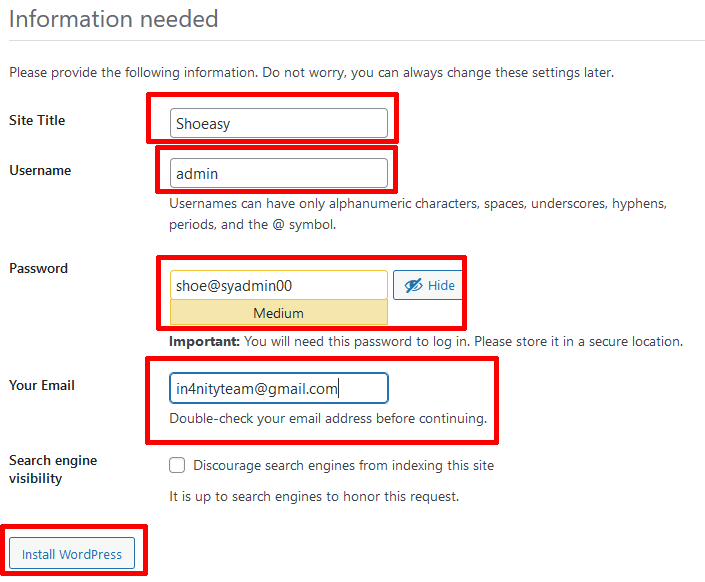
- Fill up the information required and click on Install WordPress
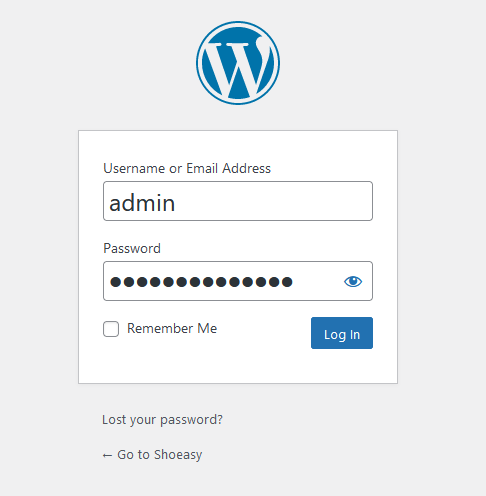
- WordPress has been successfully installed.

- Login to WordPress using the login credentials you used before during the setup phase
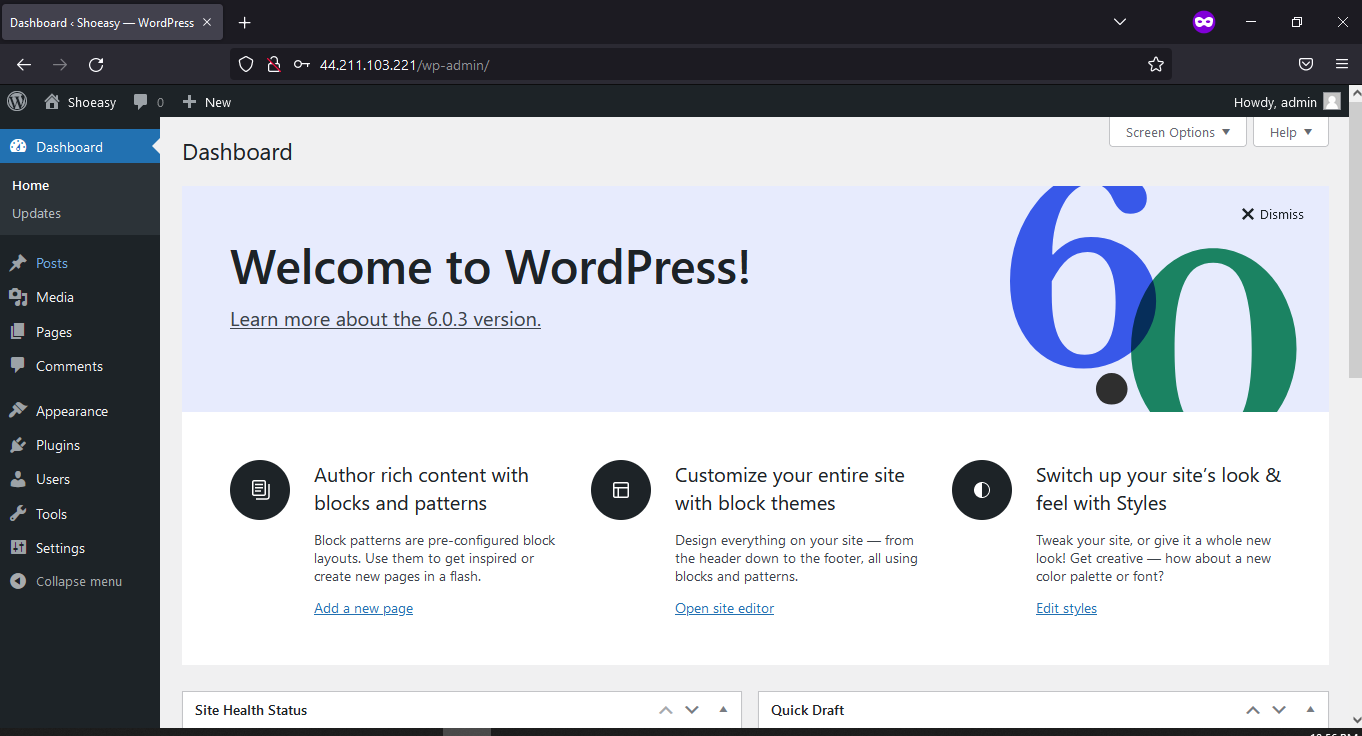
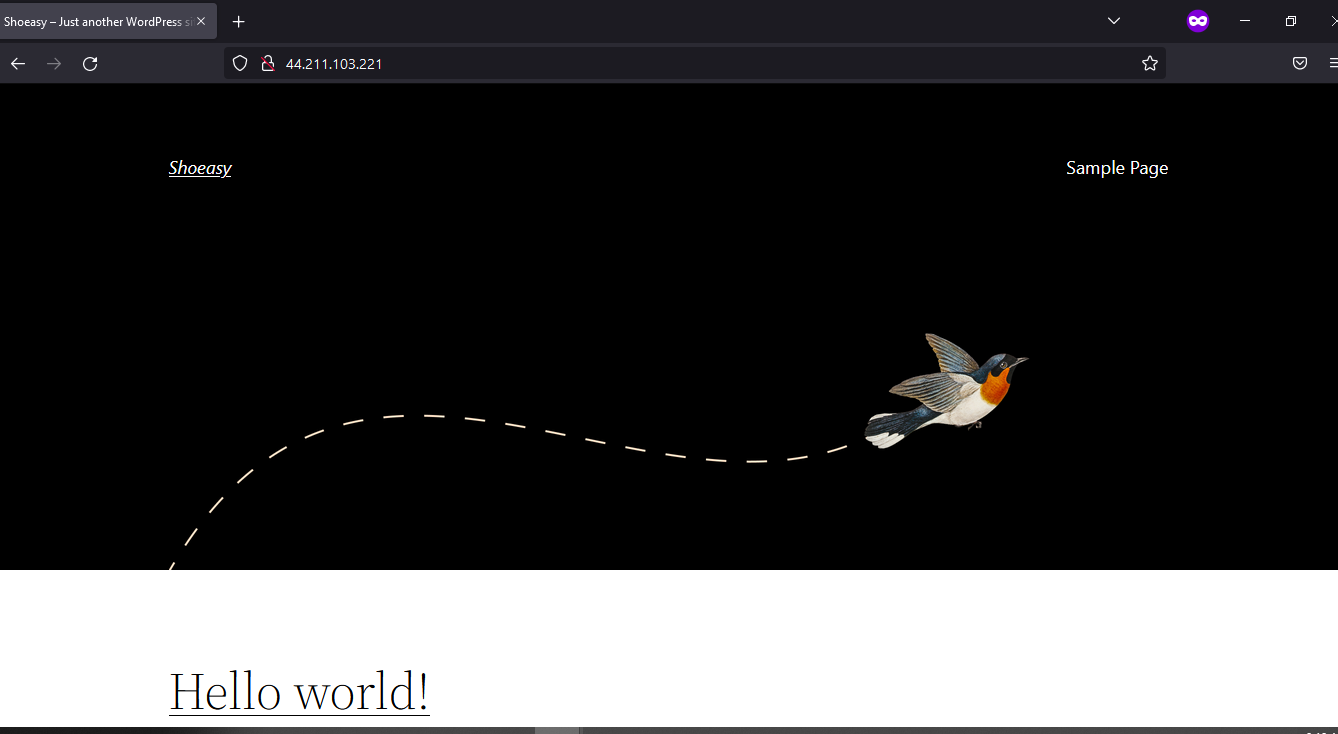
- Boom !! You are done.
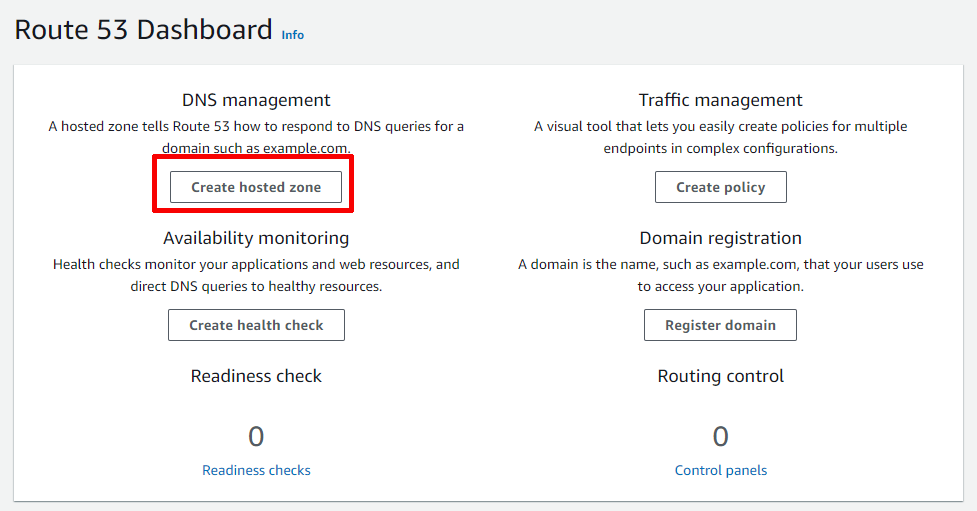
Step7: Map Elastic IP to a custom domain
- Open Route53 and Create a hosted zone
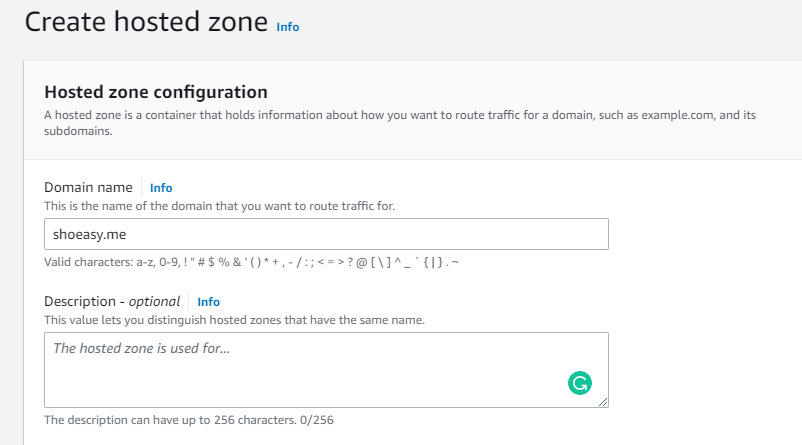
- Give your domain name and description(optional), keep the rest default, and hit create
- Change nameservers of your domain
I am using NameCheap for a domain. You can use Route53 or any third-party registrar to purchase the domain.
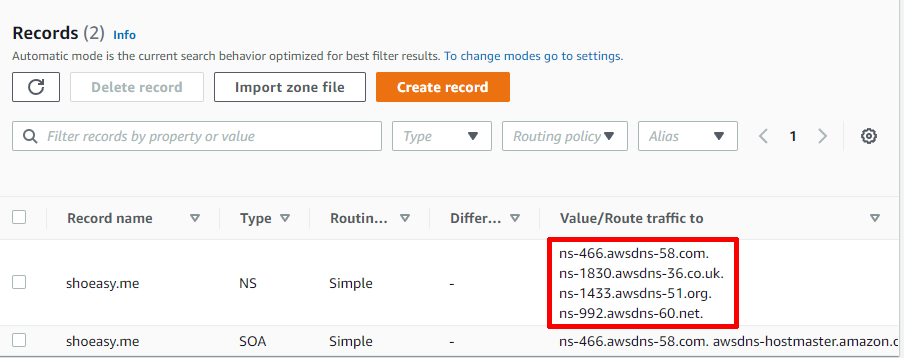
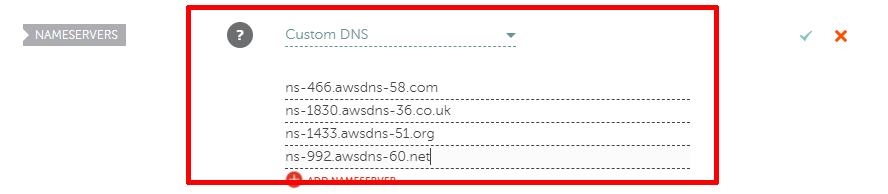
Note: It might take up to 48 hours to reflect the DNS change depending upon your domain registrar.
- Create record

- Copy your Elastic IP
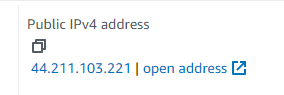
- Create a A record and paste the above copied IPV4 in the value field
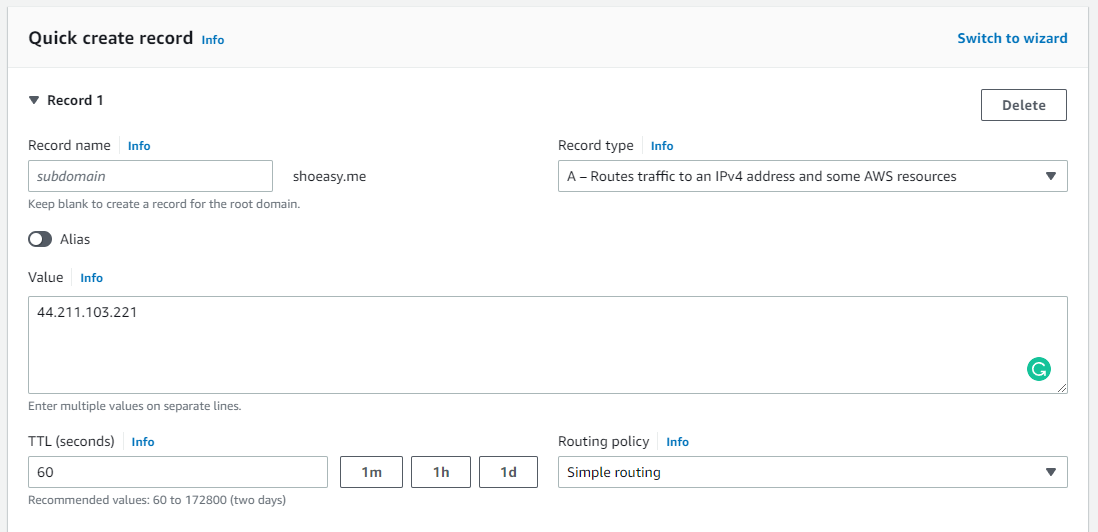
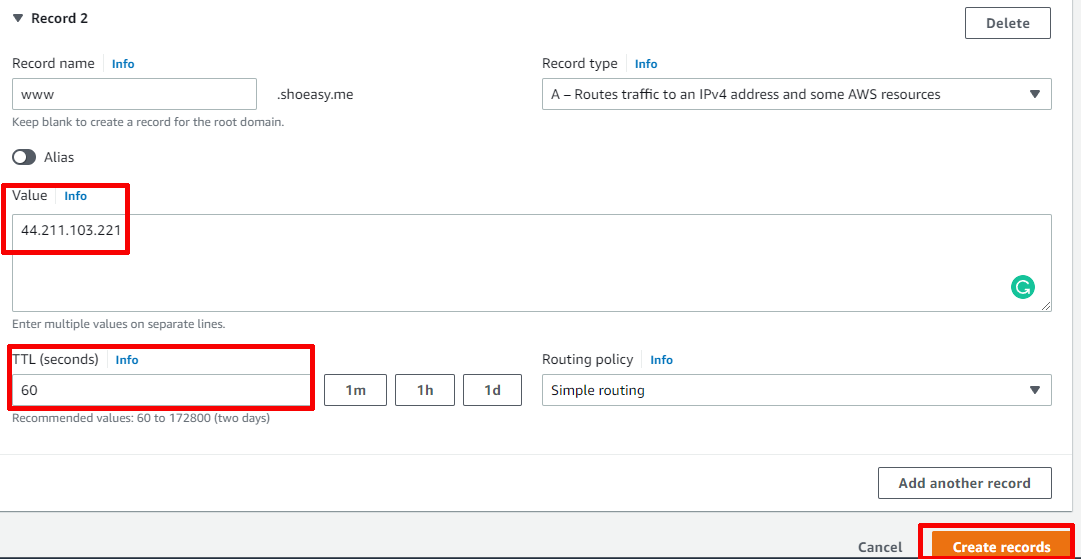
Note: The time for which a DNS resolver caches a response is set by a value called the time to live (TTL) associated with every record. Amazon Route 53 does not have a default TTL for any record type. You must always specify a TTL for each record so that caching DNS resolvers can cache your DNS records to the length of time specified through the TTL.
I have used a simple routing policy. I will write a separate blog about the use cases of different routing policies.
- Modify 000-default.conf file and add your ServerName and ServerAlias
Example ServerName shoeasy.me ServerAilas www.shoeasy.me
cd /etc/apache2/sites-available/
nano 000-default.conf
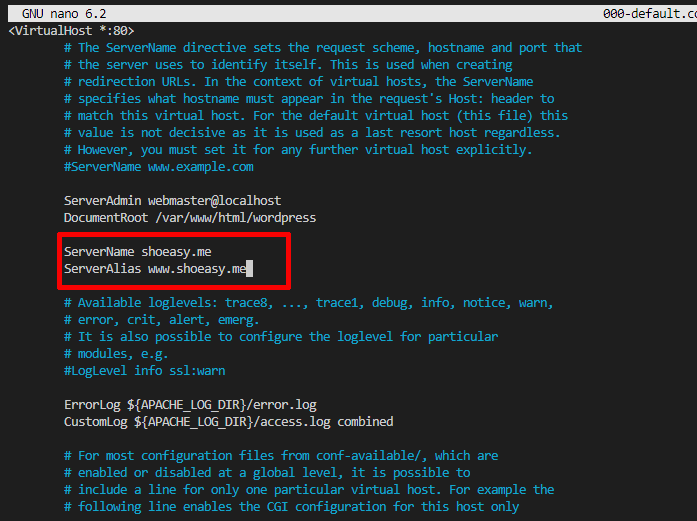
- Save and restart an Apache Server You are all done
systemctl reload apache2
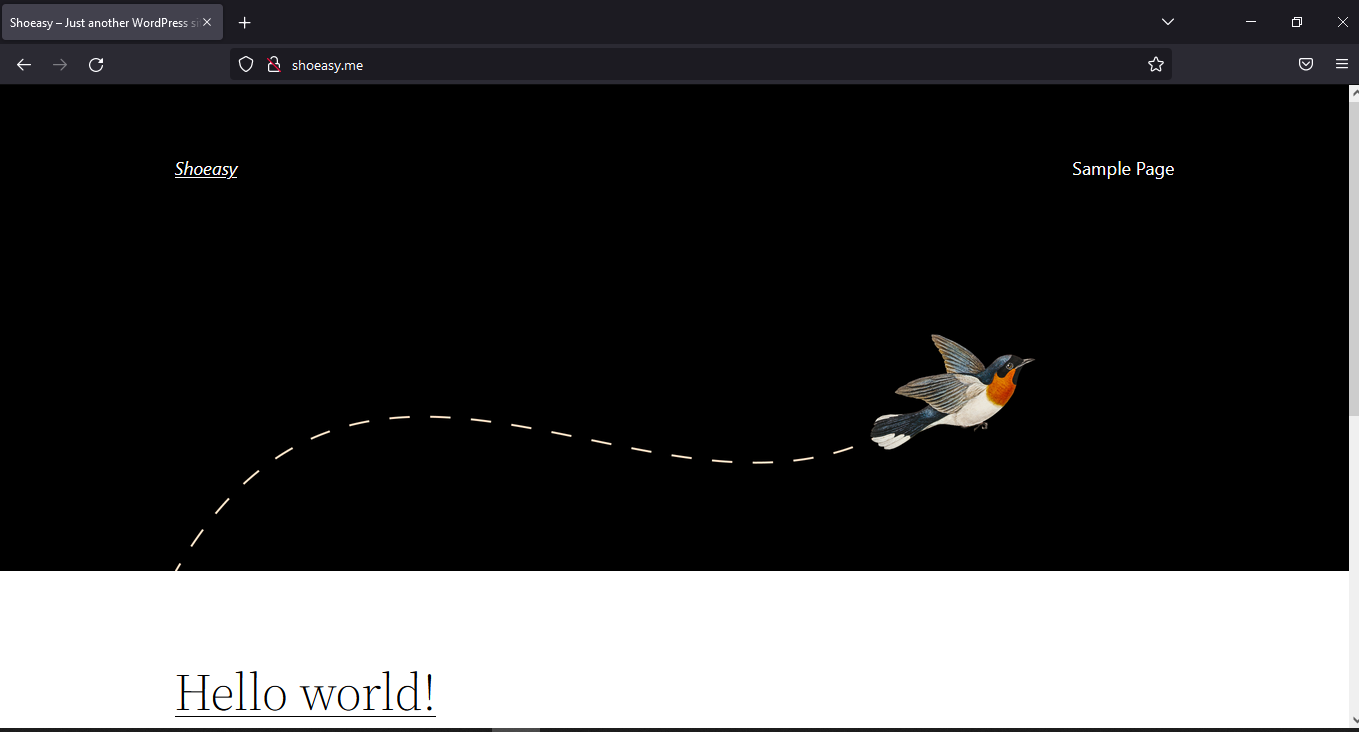
when you try to log in to the website using yoursite/wp-login.php it again redirects to IPV4. So, let's fix this
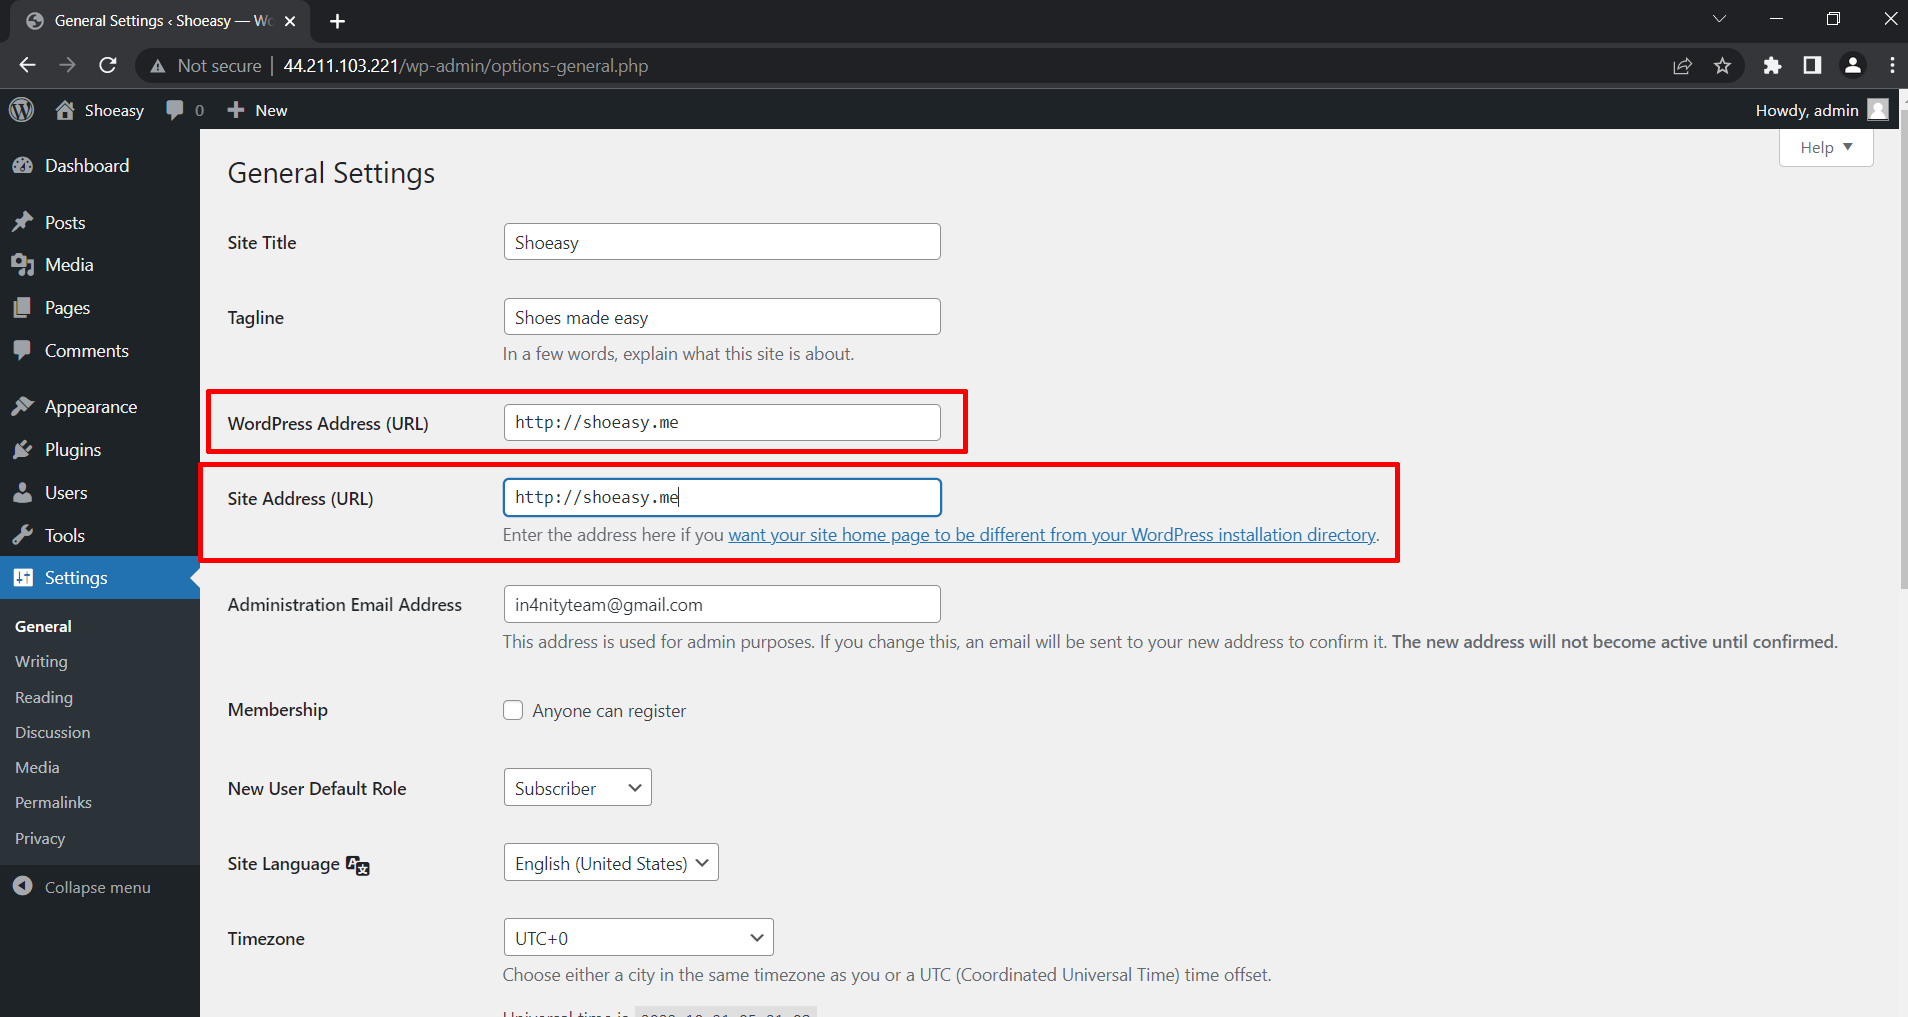
login to WordPress -Goto settings, Replace WordPress Address(URL) and Site Address(URL) with your domain name, and Save Changes.
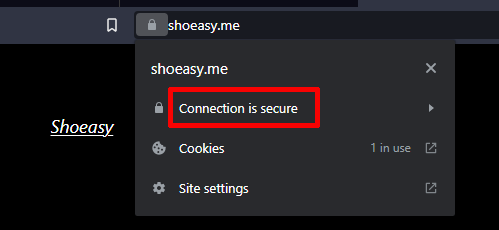
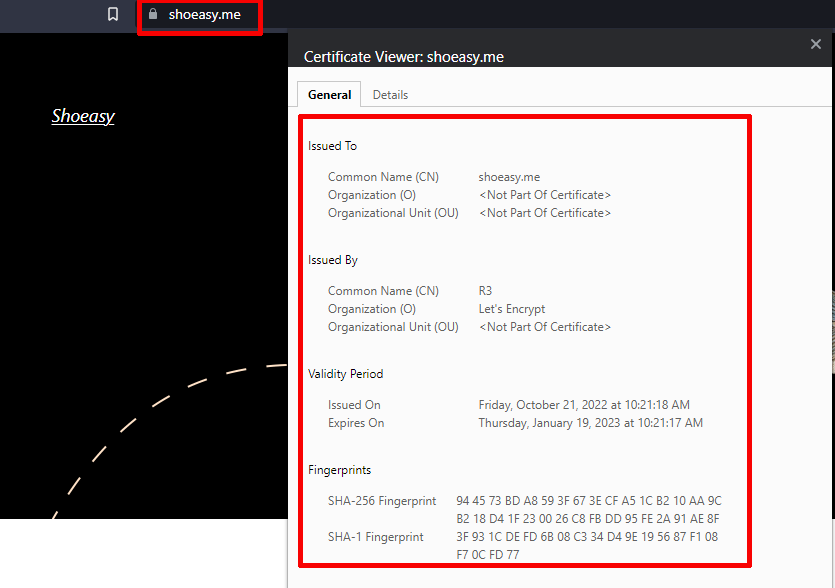
Step8: Adding SSL Certificate
An SSL certificate encrypts the information so that it's not readable until it reaches the server that it's intended for. No one can intercept and read the information as it travels from your computer to the web servers.

- Install certbot
apt install certbot python3-certbot-apache
- Request and install SSL on your site with certbot
Read the Terms of Service and Type Yes to agree. Provide an email and it will detect your domains simply hit enter to install SSL on all your domain
certbot --apache
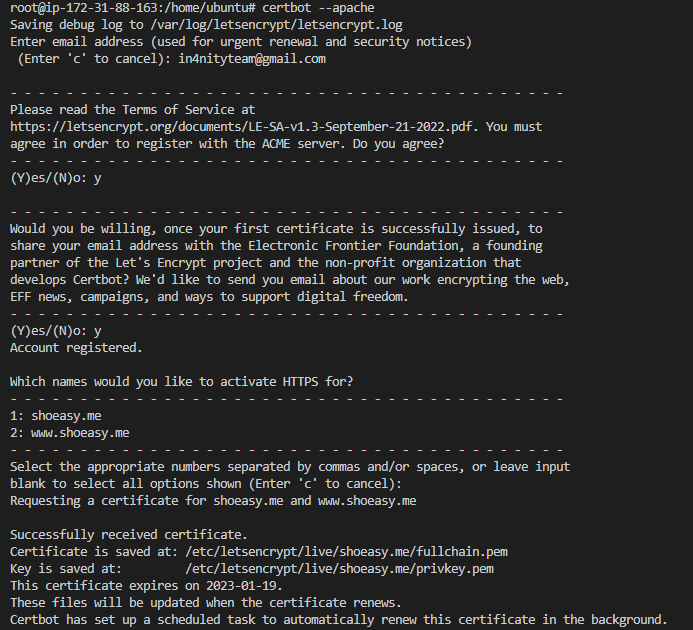

- You have successfully installed SSL certificate on your site