
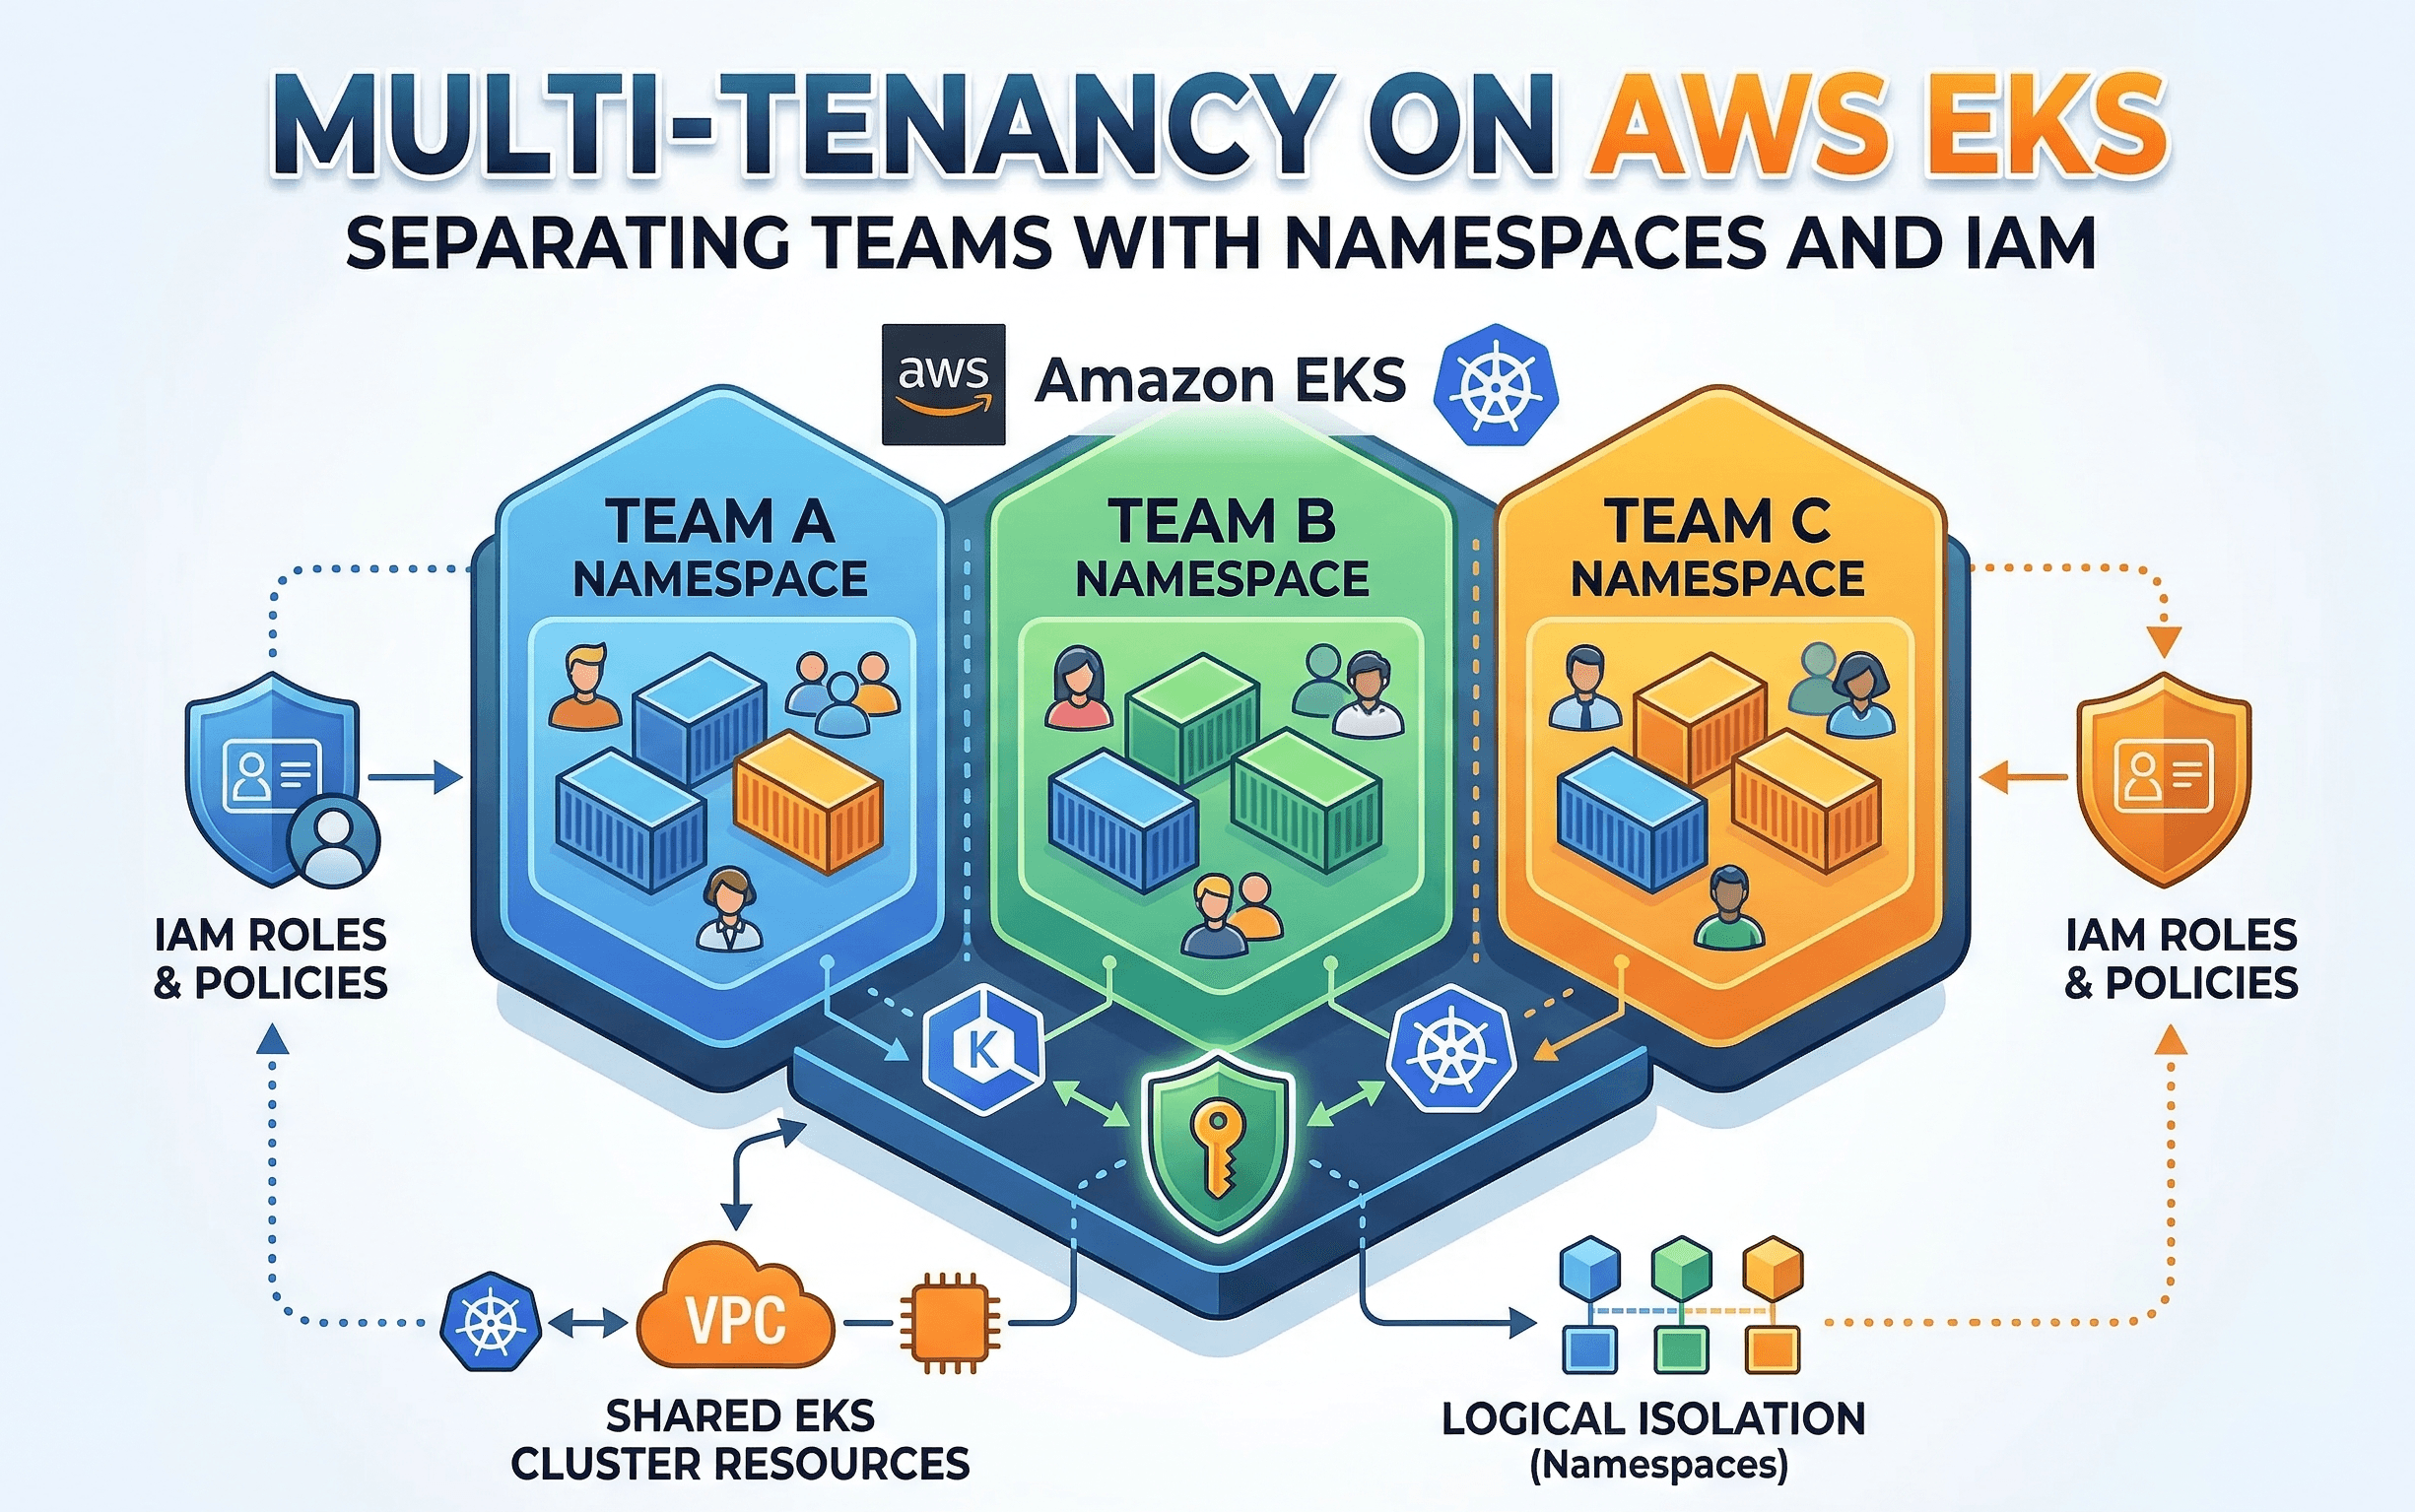
Multi-Tenancy on AWS EKS: Separating Teams with Namespaces and IAM
Cloud Engineer | AWS Community Builder
As your team and projects grow, managing a single EKS cluster can get complicated. You'll likely have different teams like a "Backend Team" and a "Frontend Team" all needing to deploy their applications. If everyone deploys to the same place, things can get messy. Resources can be over-consumed, security becomes a concern, and it's hard to tell who owns what.
The solution to this common problem is multi-tenancy. Multi-tenancy is the practice of having multiple tenants (in this case, teams or applications) share the same EKS cluster while being logically isolated from each other. This is a highly efficient and cost-effective way to manage your Kubernetes infrastructure.
This blog post will walk you through a simple yet powerful way to achieve multi-tenancy on AWS EKS using two fundamental concepts: Kubernetes Namespaces and AWS IAM for EKS. By the end, you will have a practical setup that provides clear separation and security for different teams.
The Problem: A Single, Shared Cluster
Imagine a scenario where both the Backend Team and Frontend Team deploy their applications to the default namespace.
Chaos: Deployments might accidentally have the same names, leading to conflicts.
Resource Hogs: The Frontend Team's application could suddenly get a lot of traffic and use up all the cluster's CPU, making the Backend Team's services slow or unresponsive.
Security Risks: An engineer from the Backend Team might have permissions to accidentally delete a critical service belonging to the Frontend Team.
No Ownership: When something goes wrong, it's difficult to quickly figure out which team is responsible.
The Solution: Namespaces + IAM
Our solution is to create a dedicated namespace for each team. A namespace is a virtual partition inside a Kubernetes cluster. It gives you a way to divide cluster resources and provide a scope for names. But just creating a namespace isn't enough; we need to enforce who can access what. This is where AWS IAM comes in.
AWS EKS has a powerful feature that lets you map AWS IAM roles directly to Kubernetes RBAC (Role-Based Access Control) permissions. This allows you to say, "The IAM role for the Backend Team's developers can only access the backend-team namespace, and nothing else."
Here's the plan:
Create an EKS Cluster: We'll start with a standard EKS cluster.
Create Namespaces: We'll create two namespaces, backend-team and frontend-team.
Create IAM Roles: We'll set up two IAM roles, BackendTeamDeveloper and FrontendTeamDeveloper.
Map IAM to RBAC: We'll use EKS's built-in access management to grant each IAM role specific permissions for their respective namespaces.
Deploy and Demo: We'll deploy a simple application for each team and demonstrate how they are isolated.
Practical Demo: Step-by-Step
This demo assumes you have the AWS CLI and kubectl configured.
Step 1: Create an EKS Cluster
apiVersion: eksctl.io/v1alpha5
kind: ClusterConfig

metadata:
  name: multi-tenancy-demo
  region: us-east-1
  version: "1.28"

managedNodeGroups:
- name: standard-nodes
  instanceType: t3.medium
  desiredCapacity: 2
Now, create the cluster:
eksctl create cluster -f cluster.yaml
Step 2: Create Namespaces
Once your cluster is active, let's create a dedicated namespace for each team.
kubectl create namespace backend-team
kubectl create namespace frontend-team
You can verify the namespaces are created with:
kubectl get namespaces

Step 3: Create IAM Roles
In the AWS Console, navigate to the IAM service and create two IAM roles:
BackendTeamDeveloper
FrontendTeamDeveloper
These roles are what your team members will assume to interact with the cluster. For this demo, you can leave the roles without any specific permissions initially. The EKS access management will handle the permissions for the cluster itself.

Step 4: Map IAM Roles to Namespaces and Kubernetes Role RoleBinding
This is the most critical step for security. We'll use EKS's Access Management feature to map our IAM roles to specific permissions within the cluster.
You need to use the AWS CLI to create an Access Entry and Access Policy for each team. Replace 123456789 with your AWS account ID.
# For the Backend Team

eksctl create accessentry --cluster multi-tenancy-demo \ --principal-arn arn:aws:iam::123456789:role/BackendTeamDeveloper \ --type STANDARD

# For the Frontend Team

eksctl create accessentry --cluster multi-tenancy-demo \ --principal-arn arn:aws:iam::123456789:role/FrontendTeamDeveloper \ --type STANDARD
Now, we'll create the RBAC resources.
# This Role defines permissions for the backend team within their namespace
apiVersion: rbac.authorization.k8s.io/v1
kind: Role
metadata:
  name: backend-team-developer-role
  namespace: backend-team
rules:
- apiGroups: ["", "apps", "extensions"]
  resources: ["pods", "deployments", "services", "configmaps"]
  verbs: ["get", "list", "watch", "create", "update", "patch", "delete"]
- apiGroups: [""]
  resources: ["secrets"]
  verbs: ["get", "list"]
---
# This RoleBinding links the IAM principal to the Role
apiVersion: rbac.authorization.k8s.io/v1
kind: RoleBinding
metadata:
  name: backend-team-developer-rolebinding
  namespace: backend-team
subjects:
- kind: User
  name: arn:aws:iam::123456789:role/BackendTeamDeveloper # This must match the principal ARN
  apiGroup: rbac.authorization.k8s.io
roleRef:
  kind: Role
  name: backend-team-developer-role
  apiGroup: rbac.authorization.k8s.io
# This Role defines permissions for the frontend team within their namespace
apiVersion: rbac.authorization.k8s.io/v1
kind: Role
metadata:
  name: frontend-team-developer-role
  namespace: frontend-team
rules:
- apiGroups: ["", "apps", "extensions"]
  resources: ["pods", "deployments", "services", "configmaps"]
  verbs: ["get", "list", "watch", "create", "update", "patch", "delete"]
---
# This RoleBinding links the IAM principal to the Role
apiVersion: rbac.authorization.k8s.io/v1
kind: RoleBinding
metadata:
  name: frontend-team-developer-rolebinding
  namespace: frontend-team
subjects:
- kind: User
 name: arn:aws:iam::123456789:role/FrontendTeamDeveloper # This must match the principal ARN
  apiGroup: rbac.authorization.k8s.io
roleRef:
  kind: Role
  name: frontend-team-developer-role
  apiGroup: rbac.authorization.k8s.io
Apply these files to your cluster:
kubectl apply -f backend-team-rbac.yaml
kubectl apply -f frontend-team-rbac.yaml
Step 5: Demoing the Isolation
Let's see how this works in practice.First, assume the BackendTeamDeveloper IAM role using the AWS CLI.
aws sts assume-role --role-arn arn:aws:iam::123456789012:role/BackendTeamDeveloper --role-session-name BackendTeamSession
Use the returned credentials to configure your AWS CLI session and verify identity
aws sts get-caller-identity
Now, try to deploy an Nginx server into the backend-team namespace.
apiVersion: apps/v1
kind: Deployment
metadata:
  name: backend-app
  namespace: backend-team
spec:
  replicas: 1
  selector:
    matchLabels:
      app: backend-app
  template:
    metadata:
      labels:
        app: backend-app
    spec:
      containers:
      - name: nginx
        image: nginx:latest
Deploy the application:
kubectl apply -f backend-app.yaml
This should work perfectly. The pod will be created in the backend-team namespace.
Now, with the same IAM role (BackendTeamDeveloper), try to list pods in the frontend-team namespace:
Error from server (Forbidden): pods is forbidden: User "arn:aws:sts::123456789:assumed-role/BackendTeamDeveloper/..." cannot list resource "pods" in API group "" in the namespace "frontend-team"
Again, a Forbidden error confirms our security model is working perfectly.
Conclusion
This hands-on guide confirms that secure multi-tenancy on AWS EKS is built on a two-step process: using eksctl to map IAM roles to Kubernetes identities, then using Kubernetes RBAC to enforce granular permissions. The Forbidden errors we encountered were the ultimate proof of a successful setup, confirming that our security model is fully functional and providing a robust foundation for shared EKS clusters.