
Recovering Lost EC2 Key Pair: A Step-by-Step Guide to Creating a New Key Pair
Cloud Engineer | AWS Community Builder
Introduction:
Amazon Elastic Compute Cloud (EC2) is a powerful and flexible cloud computing service that allows users to run virtual servers in the cloud. EC2 instances are secured using key pairs, which consist of a public key that is stored on the instance and a private key that the user securely keeps. Losing access to the private key can be challenging, but fear not – Amazon Web Services (AWS) provides a straightforward process to recover from this predicament. In this blog post, we will guide you through recovering a lost EC2 key pair by creating a new one.
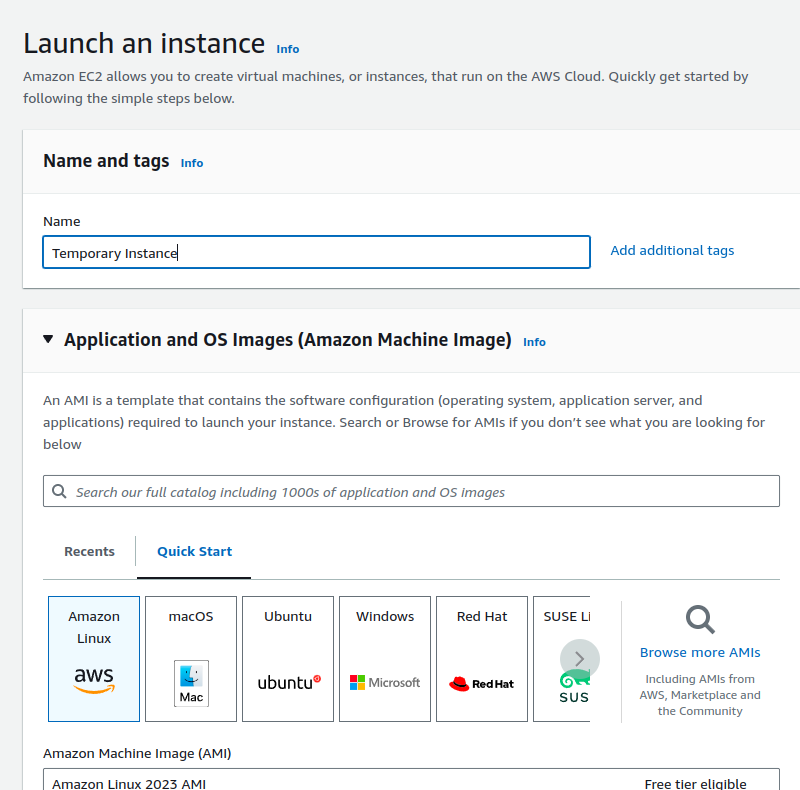
Step1: Launch a New Temporary Instance:
In your AWS Management Console, create a new temporary instance.
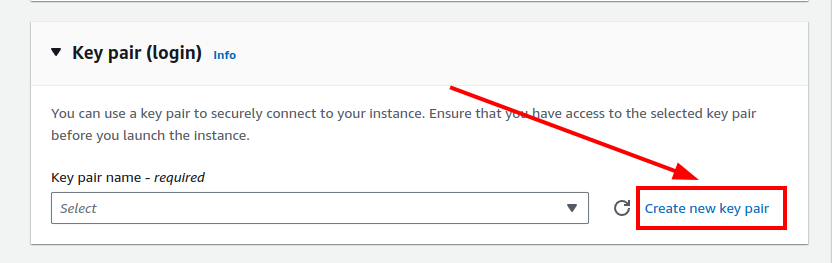
Step2: Create a New Key Pair:
Generate a new key pair and give it a name during the creation process.

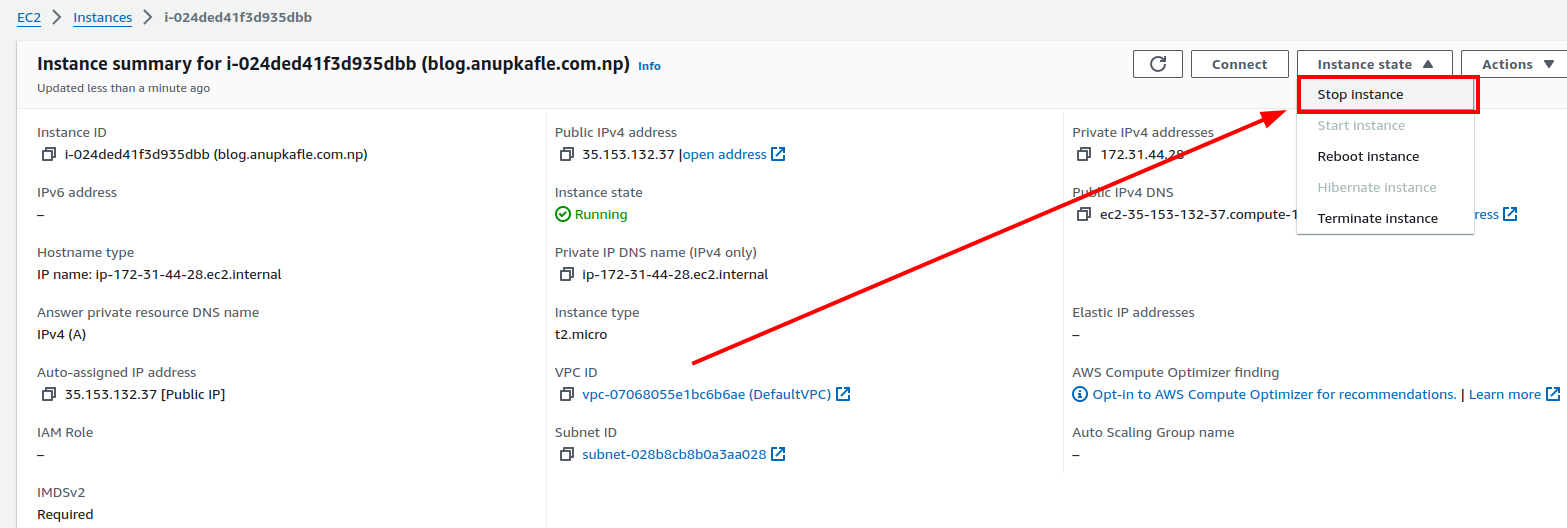
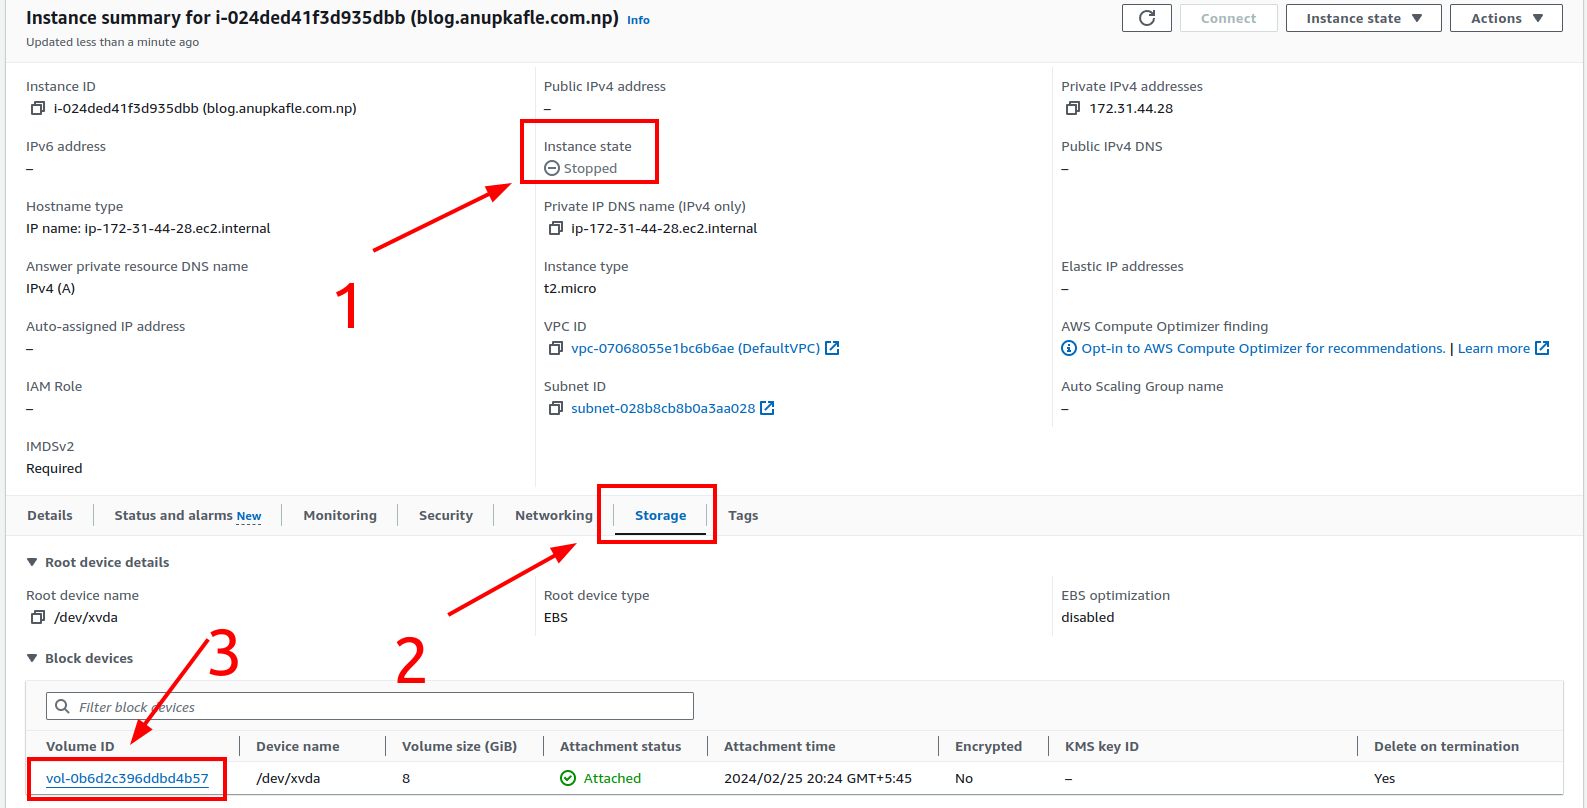
Step3: Stop the Old Instance:
Navigate to your old instance (blog.anupkafle.com.np) and stop it.
Step4: Go to your Volume:
After the instance is stopped, go to storage, and click on the volume ID.
Step5: Rename the volume Volume (optional):
Rename your volume so that we can recognize it easily.

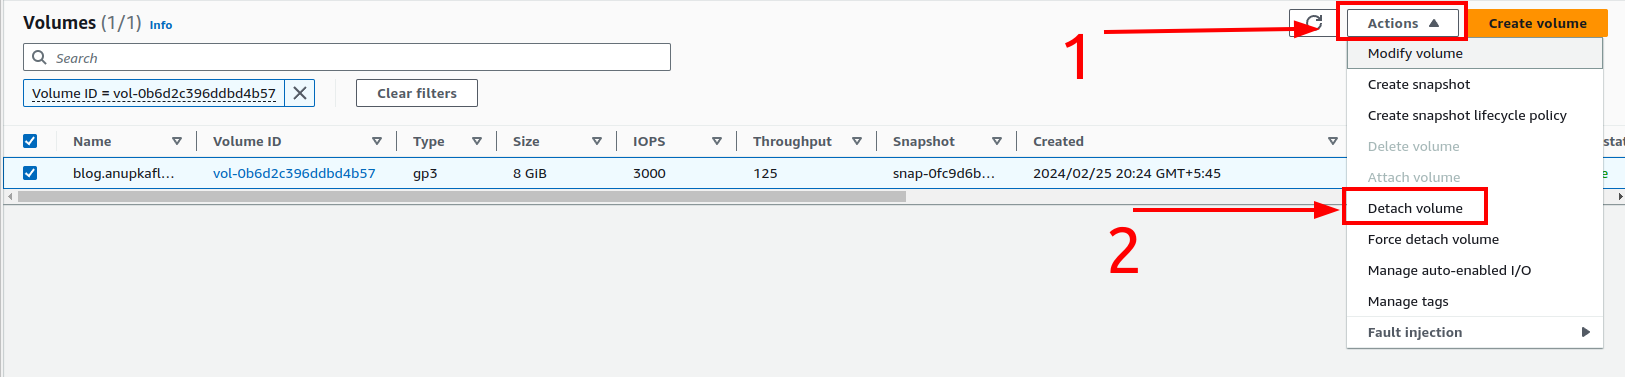
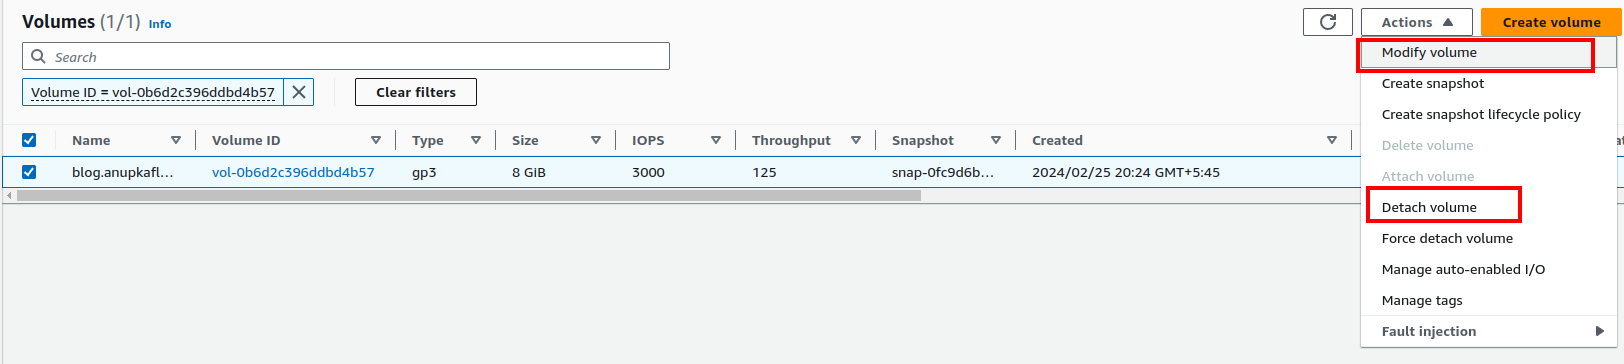
Step6: Detach Old Volume:
In the Volume, go to Actions, and detach it.

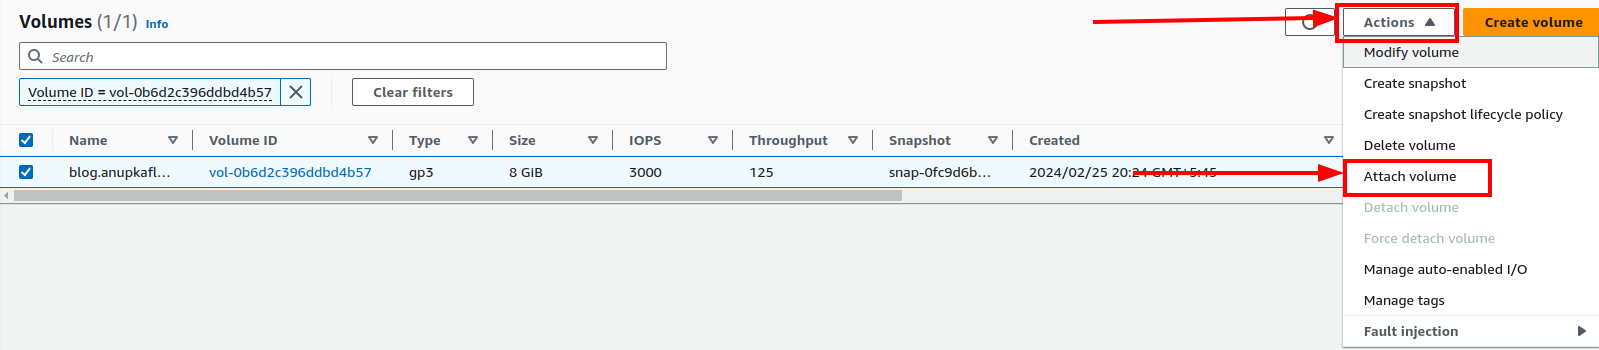
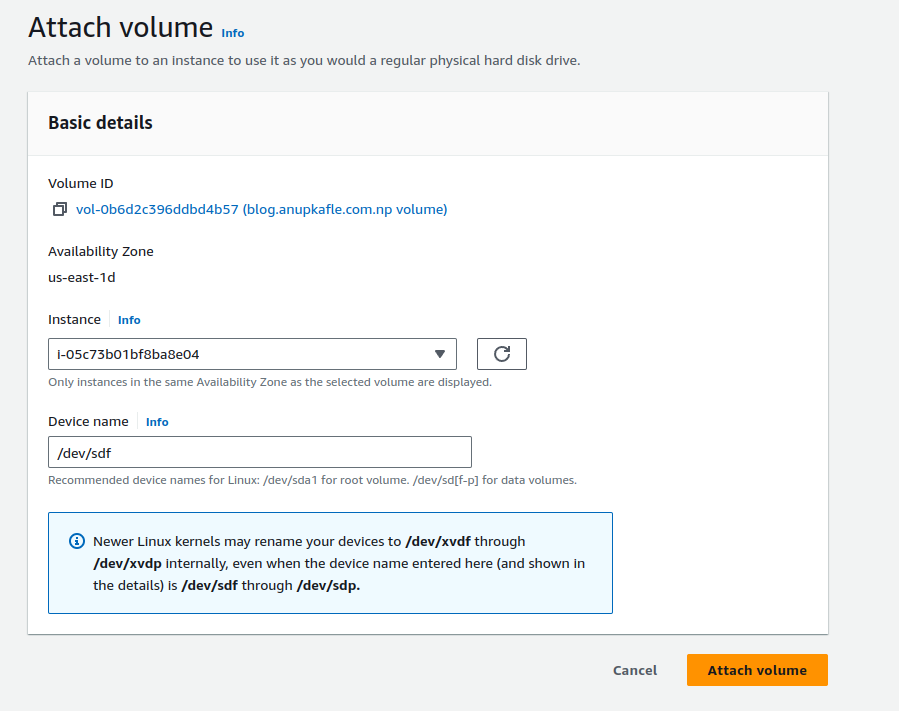
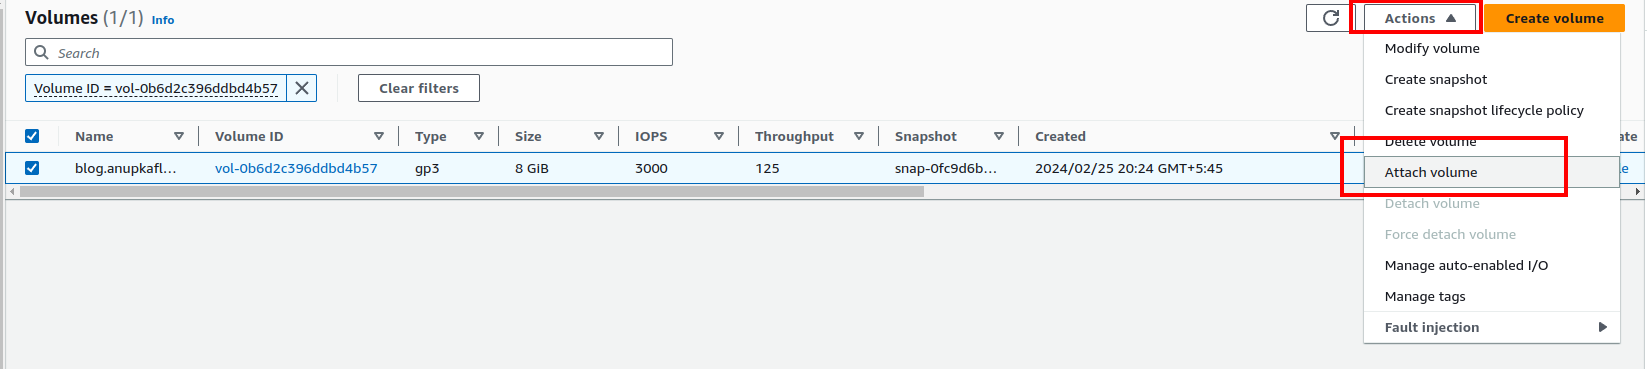
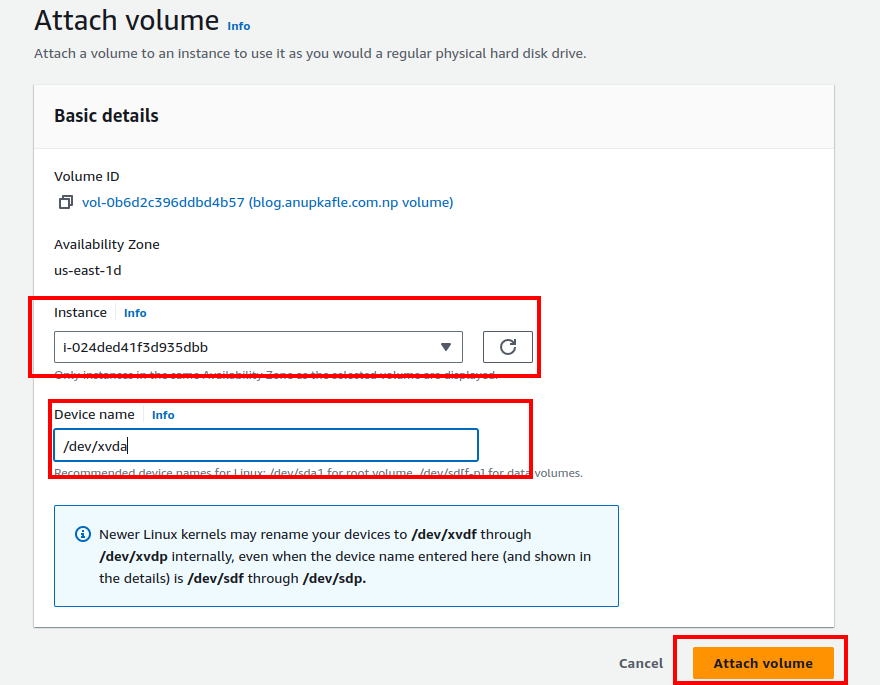
Step7: Attach Volume to Temporary Instance:
Attach the detached volume to your new temporary instance.
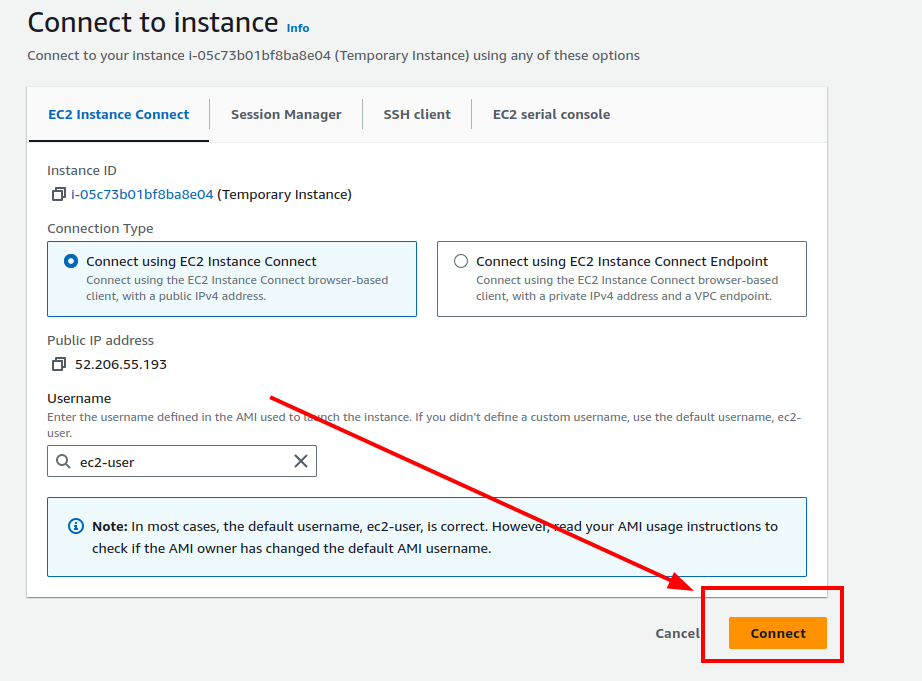
Step8: Connect to Temporary Instance:
Utilize AWS Instance Connect or SSH from your terminal to connect to the temporary instance.

Step9: Prepare for Disk Operations:
Create a directory:
mkdir -p /var/anupblog-disk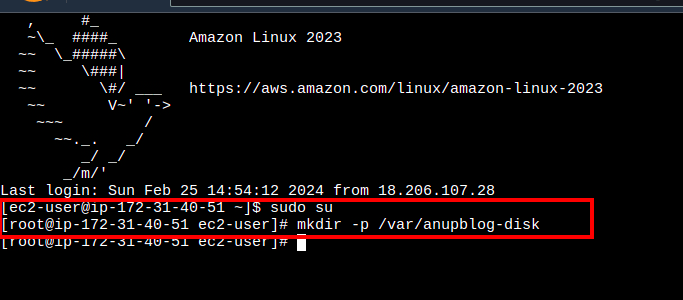
Step10: Mount Old Disk:
Mount the old disk to the temporary instance.
mount -o nouuid /dev/xvdf1 /var/anupblog-disk
Use
lsblkto confirm the volume attachment.
Step11: Copy New Public Key to Mounted Disk:
Copy the new public key:
cat /home/ec2-user/.ssh/authorized_keys >> /var/anupblog-disk/home/ec2-user/.ssh/authorized_keys

Step12: Unmount the Disk:
Safely unmount the disk:
umount /var/anupblog-disk

Step13: Detach Volume from Temporary Instance:
In the AWS Console, detach the volume from the temporary instance.
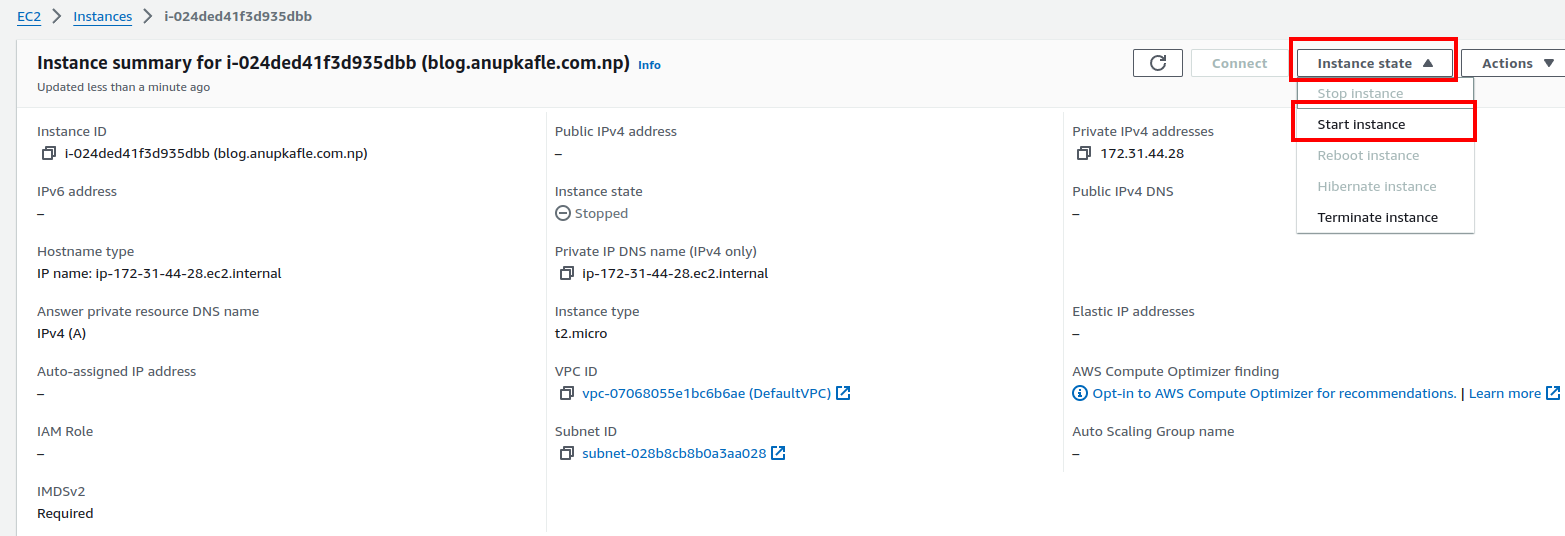
Step14: Attach Volume to Old Instance:
Attach the volume to the old instance, ensuring the device name remains the same.
Step15: Start the Old Instance:
Start your old instance.
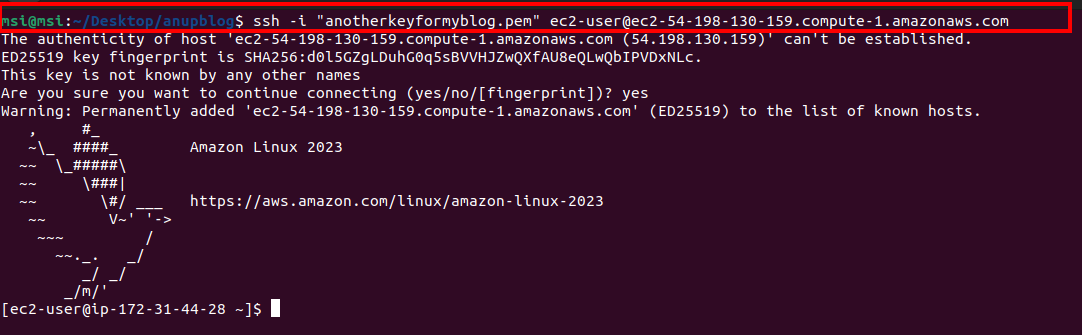
Step16: SSH into the Instance:
- Using the key created for the temporary instance, SSH into your old instance.
Conclusion:
Losing access to an EC2 instance due to a lost key pair can be a nerve-wracking experience, but AWS provides a clear and effective process for recovery. By following the step-by-step guide outlined in this blog post, you can create a new key pair, associate it with your EC2 instance, and regain control of your virtual server. Remember to maintain secure practices for managing and storing your key pairs to prevent future issues.