
Deploy a Static Website in AWS S3 Using Terraform

Cloud Engineer | AWS Community Builder
Individuals and businesses must have a web presence in today's digital world. Whether you're a developer trying to exhibit your portfolio or a firm launching a new product, rapidly and efficiently creating a website is critical. Amazon Web Services (AWS) delivers a dependable and cost-effective hosting platform. Terraform is a sophisticated infrastructure-as-code tool for defining and provisioning AWS resources. This blog will walk you through deploying a static website in AWS S3 using Terraform.
Prerequisites
Before we dive into the deployment process, make sure you have the following prerequisites in place:
AWS Account: You need an AWS account to access AWS services.
Terraform Installed: Download and install Terraform from the official website.
AWS CLI: Install the AWS Command Line Interface (CLI) and configure it with your AWS credentials. You can install it from here.
Static Website Files: Prepare the static website files (HTML, CSS, JavaScript, images, etc.) you want to deploy. Place them in a directory.
Steps to Deploy a Static Website in AWS S3 Using Terraform
Let's start by setting up your Terraform configuration. Create a file named main.tf and add the following code:
Step 1: AWS Provider Configuration
provider "aws" {
  region     = "us-east-1" # Change this to your desired region
  access_key = "your key" # Add your AWS access key ID here
  secret_key = "your secret key" # Add your AWS secret access key here
}
This block configures the AWS provider, specifying the AWS region and your access key and secret key. It tells Terraform which cloud provider to interact with and how to authenticate.
Step 2: S3 Bucket Resource
resource "aws_s3_bucket" "my-static-website" {
  bucket = "mydemostaticwebsite-2324413" # give a unique bucket name
  tags = {
    Name = "my-demo-static-website"
  }
}
Here, you define an S3 bucket resource using the aws_s3_bucket resource type. It creates an S3 bucket with the specified name and sets tags to provide metadata for the bucket.
Step 3: S3 Bucket Website Configuration
resource "aws_s3_bucket_website_configuration" "my-static-website" {
  bucket = aws_s3_bucket.my-static-website.id

  index_document {
    suffix = "index.html"
  }

  error_document {
    key = "error.html"
  }
}
This block configures the S3 bucket to act as a static website. It specifies the index document (the default file to load when accessing the website's root) and the error document (the page to display 404 errors).
Step 4: S3 Bucket Ownership Controls
resource "aws_s3_bucket_ownership_controls" "my-static-website" {
  bucket = aws_s3_bucket.my-static-website.id
  rule {
    object_ownership = "BucketOwnerPreferred"
  }
}
This block sets up ownership controls for the S3 bucket, ensuring that the bucket owner is preferred for objects within the bucket.
Step 5: S3 Bucket Public Access Block
resource "aws_s3_bucket_public_access_block" "my-static-website" {
  bucket = aws_s3_bucket.my-static-website.id

  block_public_acls       = false
  block_public_policy     = false
  ignore_public_acls      = false
  restrict_public_buckets = false
}
Here, you configure the public access block settings for the S3 bucket. In this example, public access is allowed for various locations. You can adjust these settings based on your security requirements.
Step 6: S3 Bucket ACL
resource "aws_s3_bucket_acl" "my-static-website" {
  depends_on = [
    aws_s3_bucket_ownership_controls.my-static-website,
    aws_s3_bucket_public_access_block.my-static-website,
  ]

  bucket = aws_s3_bucket.my-static-website.id
  acl    = "public-read"
}
This block sets the bucket access control list (ACL) for the S3 bucket, allowing public read access. It depends on the previous two blocks to ensure proper ownership controls and public access settings.
Step 7: Create an index.html and upload the index.html File to S3 Bucket
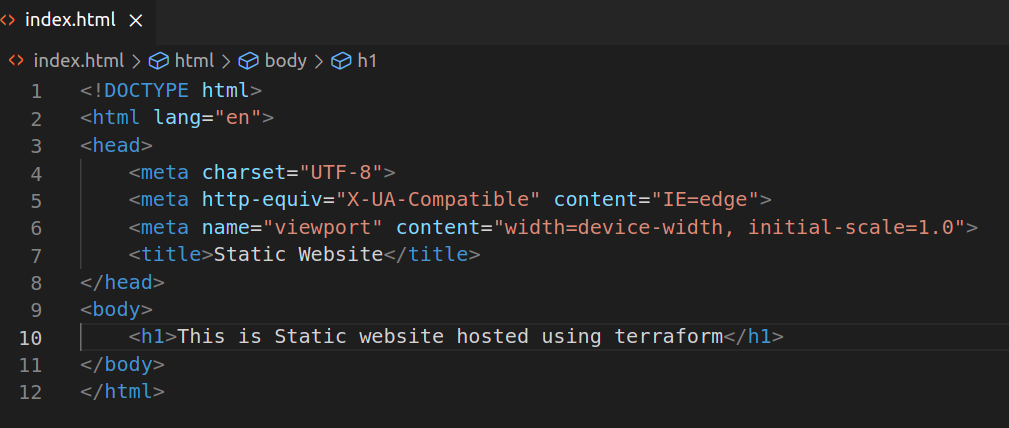
Keep index.html in the same directory where main.tf is located.
resource "aws_s3_object" "index_html" {
  bucket       = aws_s3_bucket.my-static-website.id
  key          = "index.html"  # The name you want for the file in the S3 bucket
  source       = "index.html"  # The path to your local index.html file
  content_type = "text/html"

  # Make the object publicly accessible
  acl = "public-read"
}
This block uploads the index.html file from your local directory to the S3 bucket. It also sets the content type and makes the object publicly accessible.
Step 8: S3 Static Website URL Output
output "website_url" {
  value = "http://${aws_s3_bucket.my-static-website.bucket}.s3-website.us-east-1.amazonaws.com"
}
This block defines an output variable that displays the URL of your static website after Terraform applies the configuration. The URL is constructed using the bucket name and the S3 website endpoint.
Step 9: S3 Bucket Policy
resource "aws_s3_bucket_policy" "bucket-policy" {
  bucket = aws_s3_bucket.my-static-website.id

  policy = <<POLICY
{
  "Id": "Policy",
  "Statement": [
    {
      "Action": [
        "s3:DeleteObject",
        "s3:GetObject",
        "s3:ListBucket",
        "s3:PutObject",
        "s3:PutObjectAcl"
      ],
      "Effect": "Allow",
      "Resource": [
        "arn:aws:s3:::mydemostaticwebsite-2324413/*",
        "arn:aws:s3:::mydemostaticwebsite-2324413"
        ],
      "Principal": "*"
    }
  ]
}
POLICY
}
This block defines an S3 bucket policy that allows various actions on objects within the bucket and sets the principal to "*" (anyone). This policy ensures public access to the bucket's contents.
Step 10: Overall Code
The overall above code looks like this.
# main.tf

# Configure the AWS provider with your credentials and desired region
provider "aws" {
  region     = "us-east-1" # Change this to your desired region
  access_key = "your key"  # Add your AWS access key ID
  secret_key = "your secret key"  # Add your AWS secret access key here
}

# Create an S3 bucket and website configuration
resource "aws_s3_bucket" "my-static-website" {
  bucket = "mydemostaticwebsite-2324413" # give a unique bucket name
  tags = {
    Name = "my-demo-static-website"
  }
}

resource "aws_s3_bucket_website_configuration" "my-static-website" {
  bucket = aws_s3_bucket.my-static-website.id

  index_document {
    suffix = "index.html"
  }

  error_document {
    key = "error.html"
  }
}

resource "aws_s3_bucket_ownership_controls" "my-static-website" {
  bucket = aws_s3_bucket.my-static-website.id
  rule {
    object_ownership = "BucketOwnerPreferred"
  }
}

resource "aws_s3_bucket_public_access_block" "my-static-website" {
  bucket = aws_s3_bucket.my-static-website.id

  block_public_acls       = false
  block_public_policy     = false
  ignore_public_acls      = false
  restrict_public_buckets = false
}

resource "aws_s3_bucket_acl" "my-static-website" {
  depends_on = [
    aws_s3_bucket_ownership_controls.my-static-website,
    aws_s3_bucket_public_access_block.my-static-website,
  ]

  bucket = aws_s3_bucket.my-static-website.id
  acl    = "public-read"
}

# Upload index.html from the current directory to the S3 bucket and make it public
resource "aws_s3_object" "index_html" {
  bucket       = aws_s3_bucket.my-static-website.id
  key          = "index.html"  # The name you want for the file in the S3 bucket
  source       = "index.html"  # The path to your local index.html file
  content_type = "text/html"

  # Make the object publicly accessible
  acl = "public-read"
}

# S3 static website URL
output "website_url" {
  value = "http://${aws_s3_bucket.my-static-website.bucket}.s3-website.us-east-1.amazonaws.com"
}

# S3 bucket policy
resource "aws_s3_bucket_policy" "bucket-policy" {
  bucket = aws_s3_bucket.my-static-website.id

  policy = <<POLICY
{
  "Id": "Policy",
  "Statement": [
    {
      "Action": [
        "s3:DeleteObject",
        "s3:GetObject",
        "s3:ListBucket",
        "s3:PutObject",
        "s3:PutObjectAcl"
      ],
      "Effect": "Allow",
      "Resource": [
        "arn:aws:s3:::mydemostaticwebsite-2324413/*",
        "arn:aws:s3:::mydemostaticwebsite-2324413"
        ],
      "Principal": "*"
    }
  ]
}
POLICY
}
Step 11: Deploying Your Static Website
Open your terminal and navigate to the directory containing your
main.tffile.Run the following Terraform commands:
terraform initterraform initprimarily initializes the AWS provider, installs the required provider plugin, validates the configuration files, sets up a local backend for state management, and prepares the project directory for further Terraform commands liketerraform planandterraform apply.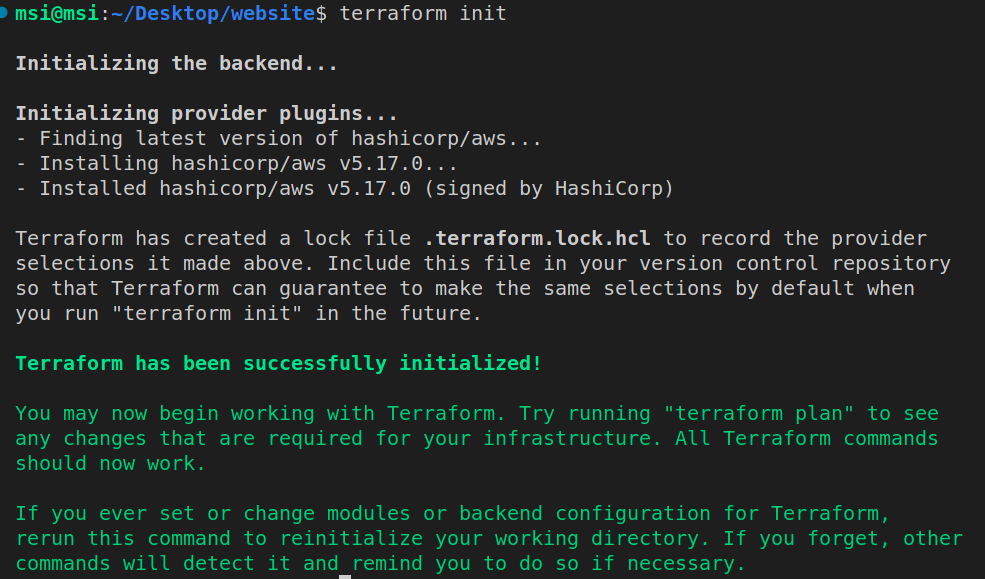
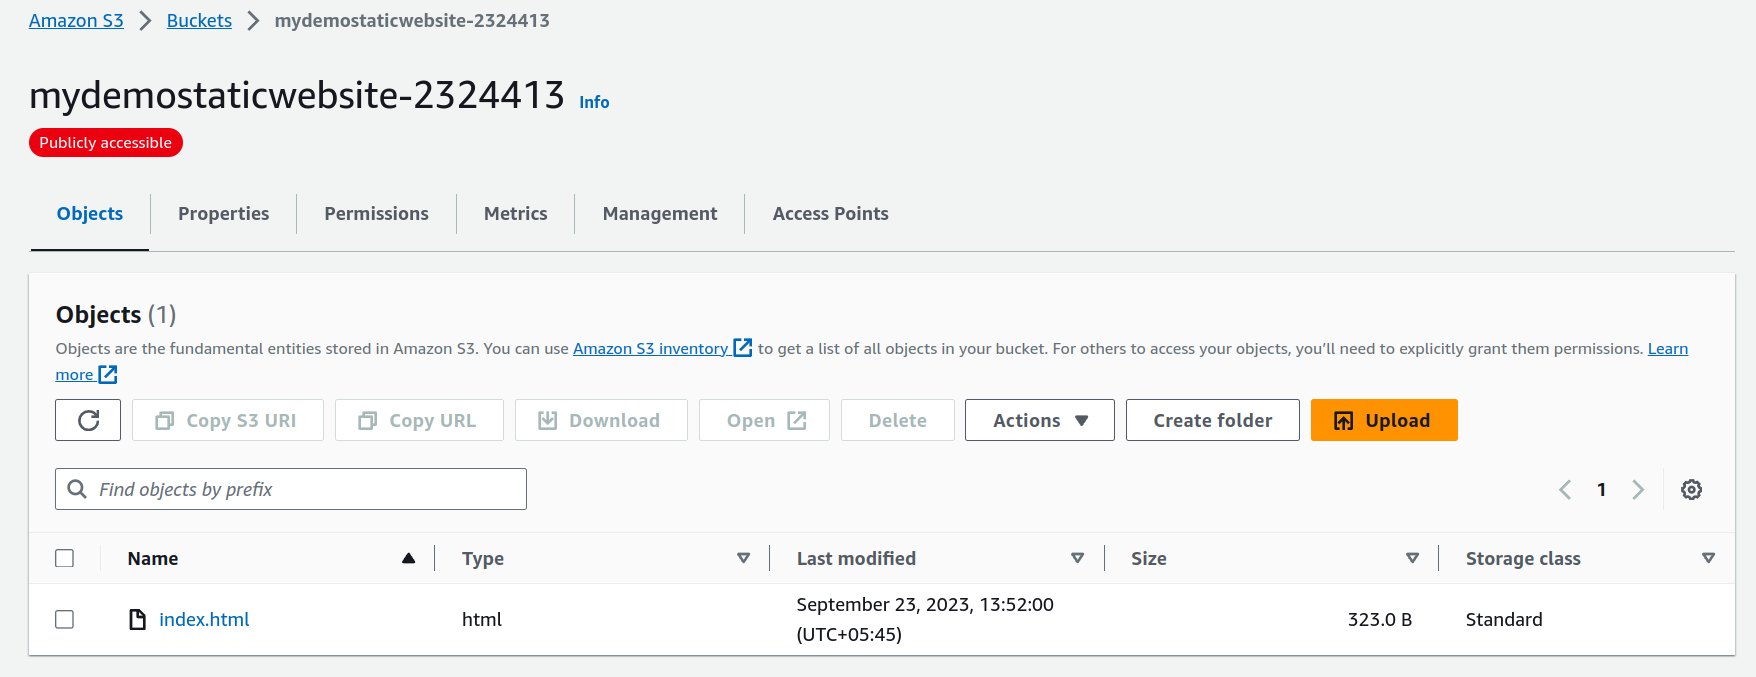
terraform apply --auto-approveIn the provided Terraform code, running
terraform apply --auto-approveinitiates applying infrastructure changes defined in the configuration without requiring manual confirmation. It automates the approval of changes, executes the planned actions, and provides the output, including the URL of the static website, as specified in the configuration. Use this flag cautiously and ensure you've reviewed your configuration carefully before applying changes, especially in production environments.Apply complete! Resources: 2 added, 0 changed, 0 destroyed. Outputs: website_url = "http://mydemostaticwebsite-2324413.s3-website.us-east-1.amazonaws.com"Once the deployment is complete, Terraform will display the URL of your static website. You can access your website using this URL.
On clicking the website_url, you can access your webpage.
Conclusion
In this blog post, you've learned how to create a static website on Amazon S3 using Terraform. By automating the infrastructure setup with Terraform, you can quickly deploy and manage your static websites on AWS. This approach provides a cost-effective and scalable solution for hosting your web content. Start building and deploying your static websites on AWS today!